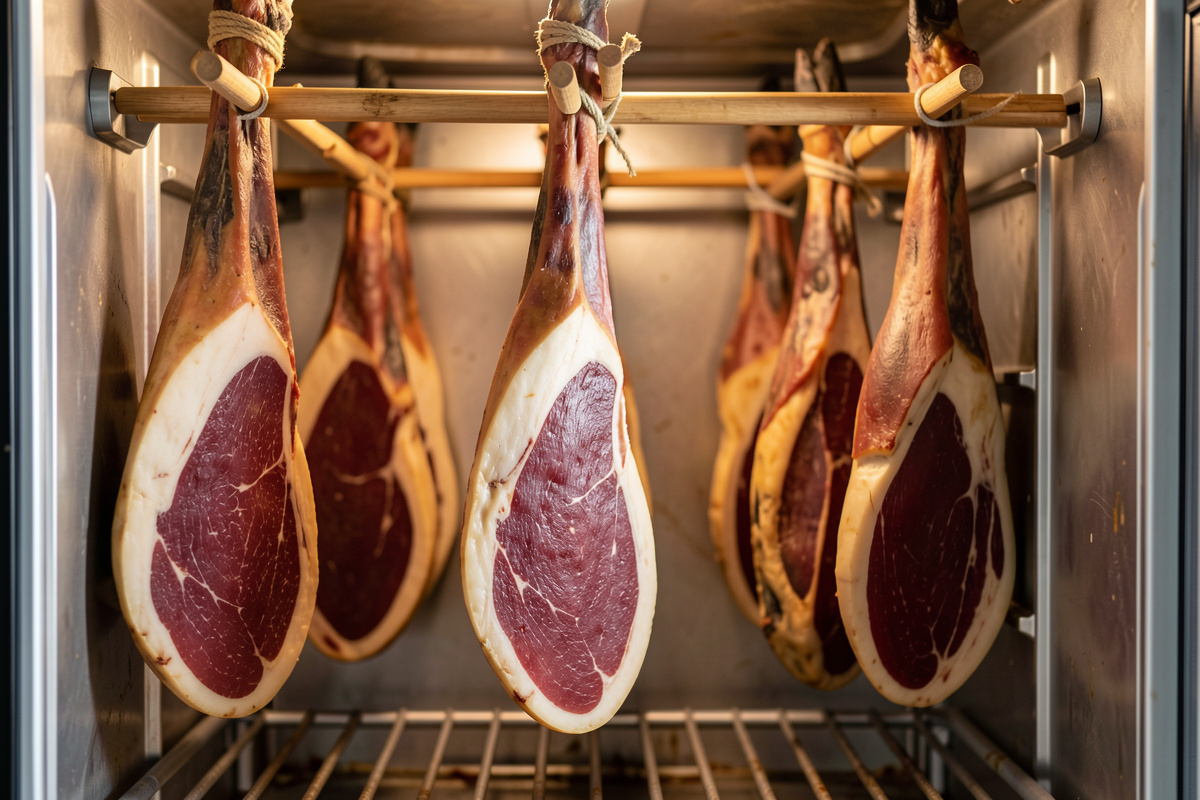

Making prosciutto at home means dry-curing a whole pork leg with salt, cure #2, cold, and patience until it loses at least 30% of its green weight and drops below a water activity of 0.91. Done right, a bone-in leg takes 12 to 18 months; a boned-and-rolled leg can finish in 5 to 9. There are no shortcuts — only a salt cure that penetrates, a chamber that holds steady, and a weight log that tells you the truth.
This is the slowest project I run, and the one that taught an impatient person to wait. I cure whole muscle across the chambers I keep in Sweden — coppa, lonzino, bresaola, guanciale — and a whole leg is all of those lessons stacked into one piece of meat that you cannot rush, cannot re-salt halfway through, and cannot fake. This guide is the map: how the cure works, why the cold salting phase is non-negotiable, what the chamber has to hold, and where legs die so yours does not. Each section links to a deeper guide, but read this first so the numbers all hang on the same frame.
What Prosciutto Actually Is
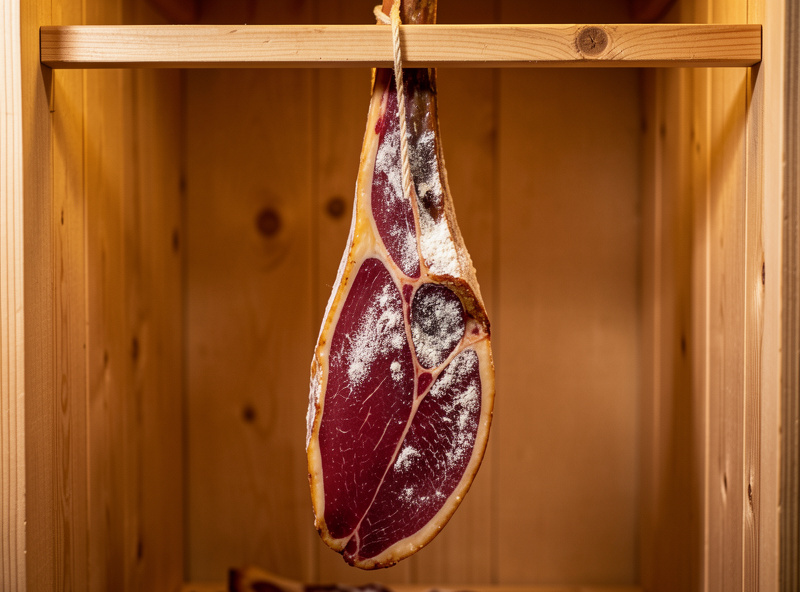
Prosciutto is a whole pork hind leg preserved by salt and time alone — no heat, no smoke, no fermentation. Safety comes from three things working together: salt that draws water out of the muscle, a cold salting phase that holds bacteria in check while the salt penetrates, and a long slow drying phase that pulls weight loss past 30% so the finished water activity is too low for pathogens to grow.
That last number is the whole game. Water activity (aw) below 0.91 is the threshold under which Clostridium botulinum and Staphylococcus aureus cannot produce toxin, and a leg that has shed a third of its weight has crossed it. Everything you do — the salt rate, the days in cure, the chamber humidity — is in service of getting there evenly and without spoiling the deep muscle near the bone before the salt arrives. Unlike a salami, there is no pH drop doing half the work; with a whole leg, salt and drying carry the entire safety load.
Choosing and Trimming the Leg
Start with a fresh (never frozen-and-thawed) pork hind leg from a butcher you trust, ideally from a heritage or well-finished pig with a generous fat cap. Freshness matters because the leg sits cold and anaerobic for weeks before drying begins, and any head start the spoilage bacteria get is a head start you cannot claw back. Ask for the leg with the trotter and skin on if you want the traditional shape, or boned if you are taking the easier route.
Trimming sets up everything that follows. You want a smooth, rounded leg with no ragged flaps that will dry into hard tabs, and you want the fat cap left intact over the skin side because it slows moisture loss exactly where you need it slowed. On the lean side, the exposed muscle face is where salt enters and where the surface will later need sugna. Trim cleanly, remove any loose fat and the gland near the top of the leg, and weigh the trimmed leg before salting — that trimmed green weight is the number every later calculation and the entire weight log hang on.
The Safety Foundation: Salt, Cure #2, and Why No-Nitrate Is a Trap at Home
For a home leg, use cure #2 in your salt mix at 2.5 grams per kilogram of green meat weight — 0.25% — and do not treat traditional Parma as your model for safety. Authentic Parma and San Daniele prosciutto are made salt-only, but under a tightly controlled commercial cold chain: legs salted at 1 to 4°C in inspected rooms, with humidity and timing held to standards a home fridge cannot guarantee. At home, cure #2 is your margin against the long, cold, anaerobic conditions a curing leg lives in for months.
Cure #2 (also sold as Prague Powder #2 or Insta Cure #2) is 6.25% sodium nitrite plus around 4% sodium nitrate. The nitrate is a reservoir that slowly converts to nitrite across a long dry-cure, which is exactly why it — and not cure #1 — belongs in any uncooked, air-dried whole muscle. At 0.25% of green weight you stay under the 156 ppm legal nitrite ceiling with comfortable headroom. Never substitute “natural” celery powder or a no-nitrate cure on a whole leg and call it safe: that is the single most dangerous shortcut in this hobby, and it is the one the internet repeats most often. If you want the full reasoning behind beneficial cultures and curing chemistry, my work on Penicillium cultures covers the same chemistry from the salami side.
Two more hard lines: never use iodized table salt (the iodine and anti-caking agents interfere and can taint flavour — use pure non-iodized salt or proper curing salt), and never eat through fuzzy black or green growth, a slimy surface, or a putrid bone smell. When a leg is wrong, it is wrong; throw it out. Read the good-versus-bad mold guide before you panic at the first white bloom, though — a powdery white coat is your friend.
Bone-In vs Boneless: Start With the Easier One
If this is your first leg, bone it out. A boneless, netted leg cures faster and far more safely than a bone-in one because the most dangerous zone in a whole ham — the deep muscle around the femur and the aitch (pelvic) bone — is exactly where salt struggles to reach in time. That deep zone is where bone sour starts: the meat spoils from the inside before the cure penetrates. Removing the bone removes the problem.
Bone-in is the traditional, dramatic, harder path. It rewards you with the classic shape and a denser, more complex result, but it demands a colder, more disciplined salting phase and a longer cure. I run both, but I tell every beginner the same thing: prove your chamber on a boned leg first. The full breakdown lives in the boneless versus bone-in guide.
| Factor | Bone-In Leg | Boneless (Boned & Netted) |
|---|---|---|
| Typical cure time | 12–18+ months | 5–9 months |
| Salt penetration risk | High (femur/aitch bone) | Low (open faces) |
| Bone-sour risk | Real if salting is warm or short | Largely eliminated |
| Best salting temp | 1–4°C, strict | 2–4°C |
| Slicing and serving | Needs a stand and skill | Easy, uniform slices |
| Beginner suitability | Advanced | Recommended first leg |
| Weight-loss target | ≥30% of green weight | ≥30% of green weight |
The Cure: Salt Coverage vs Equilibrium
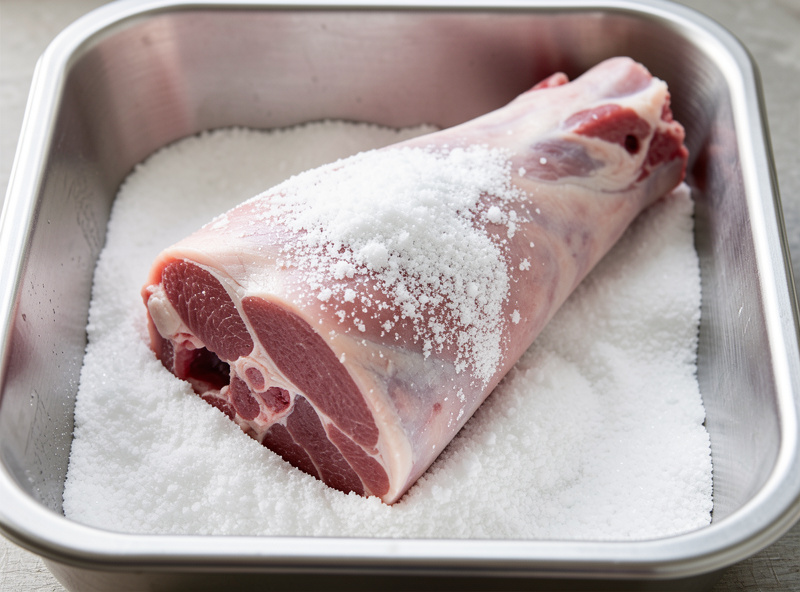
You have two ways to get salt into a leg, and they suit different cuts. The salt-coverage (salt-box) method buries the leg in salt and lets the meat take what it needs over a fixed number of days proportional to its weight — this is the traditional approach for bone-in legs, and it depends entirely on cold and on working salt into the bone seams. The equilibrium method weighs the leg, calculates an exact salt and cure #2 percentage, applies all of it, and lets it fully absorb — nothing is wasted and the meat can never over-salt. Equilibrium shines on boned legs and is far more forgiving for a home chamber.
For coverage curing I aim the salt where penetration is slowest: packed hard into the aitch-bone pocket and along the femur on a bone-in leg, and rubbed evenly across every exposed muscle face on a boned one. For equilibrium I run 3% salt for a boned leg (a touch higher, 3.25 to 3.5%, if I want more keeping security on a thick piece) plus the 0.25% cure #2 and a small percentage of dextrose or sugar to round the edge. The complete method, with the exact pocket-packing technique, is in the salt coverage guide, and the maths behind equilibrium percentages is laid out in my equilibrium salt calculation guide.
The Cold Salting Phase
The salting phase happens cold — 1 to 4°C, near the top of normal fridge temperature — and this is the part you cannot improvise. A rough rule for a bone-in leg is about one day in salt per kilogram of green weight, often split into an initial salting and a re-salt, followed by an equalisation rest where the leg sits cold under wrap so the salt distributes evenly through the muscle before any drying begins. Pressing the leg gently during salting helps expel residual blood and moisture and speeds even penetration.
Skip the cold, or cut the salting short, and you invite the deep muscle to spoil before it is protected. This is why I keep a dedicated cold shelf for the salting weeks and only move a leg into the warmer drying chamber once it has fully equalised. The boned-leg version of this timeline is gentler and shorter, which is the other reason I steer beginners there. The whole sequence — including how to handle a leg that is too big for one shelf — is detailed in the whole ham curing guide.
The Drying Phase: What the Chamber Has to Hold
Once salted and equalised, the leg moves to the drying chamber: roughly 12 to 15°C and 70 to 80% relative humidity, with gentle, intermittent air exchange. The art is in the first few weeks — start nearer the high end of humidity so the surface does not dry faster than the core, then let it drift down slowly over months. Move too fast and the outside seals into a hard shell while the inside stays wet; that is case hardening, and it kills more legs than mold ever does.
I hold my drying envelope with an Inkbird humidity controller driving both an ultrasonic humidifier and a small dehumidifier, a temperature controller on the compressor, and a low-speed 120mm fan cycling about five minutes on, twenty-five off, so the surface never dries in a draft yet stale air never sits. The deep dive on dialling and recovering this envelope is the drying room conditions guide, and the chamber-build foundations are in curing chamber climate control and how to build a curing chamber.
Timeline and Weight Loss: The Only Honest Doneness Signal
A leg is done when it has lost at least 30% of its green weight — not when the calendar says so. Weigh the leg the day it goes into salt, write that number down, and weigh it on the same scale at intervals through the cure. Texture and feel matter, but the scale is the signal I trust, the same way I trust it on every coppa and bresaola I pull. My weight-versus-feel doneness guide explains why I lead with the number.
For a bone-in leg, expect 12 to 18 months and sometimes longer to reach that loss evenly. A boned leg gets there far faster because there is more surface and less mass. Aiming past 30% — many fine prosciuttos land at 35% or more — buys keeping security and concentrates flavour, but chase it slowly: the loss should be gradual, never a fast crash in a too-dry chamber.
Step by Step: How a Leg Becomes Prosciutto
The full process, start to finish, is: select and trim a fresh leg, weigh it, apply salt and cure #2 (coverage or equilibrium), cold-salt for the calculated days with a press, equalise cold, then hang in the drying chamber and let weight loss carry it home over months. The detailed walk-through with timings is in how to make prosciutto at home, and the larger-leg and bone-in specifics are in the whole ham curing guide.
If you want to learn the rhythm of whole-muscle curing before committing a full leg and a year of chamber space, start small. A duck prosciutto teaches the salt-and-dry cycle in two weeks, and a coppa or bresaola teaches chamber discipline in a couple of months. These are the same skills at a fraction of the risk and wait.
Sealing the Face: Sugna
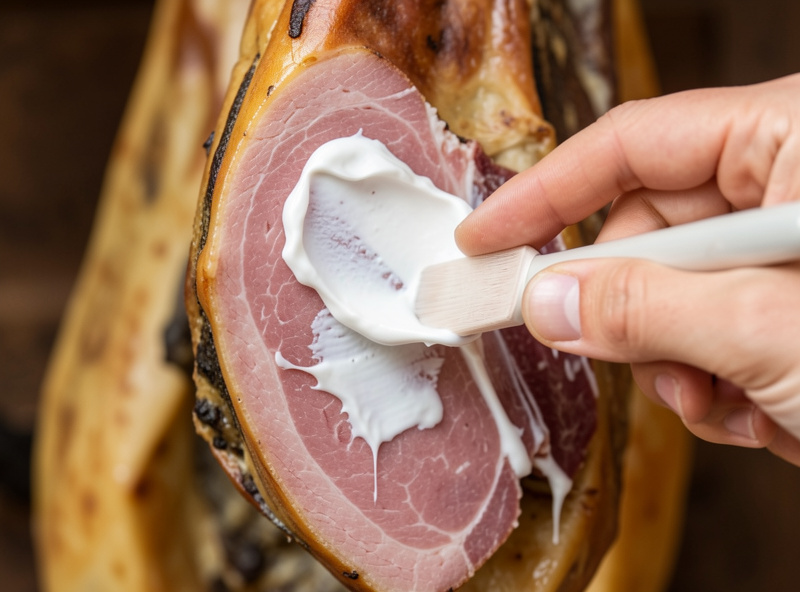
A few weeks into drying, the large exposed muscle face on a leg will start to dry far faster than the rest — the classic spot for case hardening. The traditional fix is sugna: a paste of rendered pork fat (often cut with a little rice or wheat flour, salt, and pepper) smeared over the exposed lean to slow surface moisture loss while the interior catches up. It is not decoration; it is humidity management applied directly to the one face that needs it most. Skip it on a bone-in leg and you will often find the surface hardened and the core still high in weight months later.
When Things Go Wrong
Most prosciutto failures fall into a short list: bone sour from warm or short salting, case hardening from a too-dry chamber, excessive saltiness from over-coverage, a slimy or off surface from too-high humidity with poor airflow, and the prosciutto mite or cheese mites on a long-hanging leg. Almost all of them are preventable, and several are recoverable if you catch them early. Each one — what it looks like, what causes it, and whether the leg is salvageable — is covered in the prosciutto troubleshooting guide, with the chamber-side fixes cross-referenced to case hardening causes and fixes, an over-humid chamber, and salvaging under-salted charcuterie.
After the Cure: Resting, Storing, and Slicing
When the scale finally says 30% or more, the leg is not quite finished — it benefits from a resting period in cooler, slightly more humid conditions to let the moisture that remains redistribute evenly through the muscle, softening the texture and rounding the salt. A bone-in leg, in particular, mellows noticeably over a few weeks of rest before you make the first cut. Patience pays one last dividend right at the end.
Store a whole finished leg hanging in cool, stable conditions and slice from it over weeks or months; a boned leg keeps well wrapped and refrigerated, or vacuum-sealed in portions. Slice prosciutto as thin as you can manage, against the grain — a sharp long knife and a steady hand, or a proper stand for a bone-in leg. Once cut into, the exposed face will dry and oxidise, so cover it with a film of its own fat or a sheet of parchment between sessions. A leg you waited a year for deserves to be served at its best, not hacked at and left to harden on the board.
Tools and Gear That Earn Their Place
You do not need much, but the few things you need have to be right. A reliable temperature and humidity controller pair is the heart of the chamber — I run Inkbird temperature controllers and a separate humidity controller, and I compare the options in my controller shootout. A trustworthy digital hygrometer and thermometer (salt-test calibrated), proper cure #2, a meat netting roll for boned legs, and an accurate digital scale for the weight log round out the kit. As an Amazon Associate I earn from qualifying purchases.
Frequently Asked Questions
How long does it take to make prosciutto at home?
A bone-in leg typically takes 12 to 18 months and sometimes longer to lose 30% of its green weight evenly. A boned and netted leg finishes much faster, usually 5 to 9 months, because it has more surface area and less mass.
Do I need cure #2 to make prosciutto, or can I use salt only?
At home, use cure #2 at 0.25% of green weight. Traditional Parma is salt-only but made under a controlled commercial cold chain a home fridge cannot match. Cure #2 is your safety margin against the long cold anaerobic cure, and no-nitrate substitutes are not a safe replacement.
How do I know when a prosciutto is done?
Weigh the leg the day it goes into salt and track it on the same scale. It is done when it has lost at least 30% of that green weight, which corresponds to a water activity below 0.91. The scale, not the calendar, is the doneness signal.
What chamber temperature and humidity does prosciutto need?
Salt the leg cold at 1 to 4°C, then dry at roughly 12 to 15°C and 70 to 80% relative humidity with gentle intermittent airflow. Start humidity near the high end to prevent case hardening, then let it drift down slowly over months.
Should a beginner start with a bone-in or boneless leg?
Start boneless. Removing the femur and aitch bone eliminates the deep zone where bone sour begins, lets salt penetrate evenly, and cuts the cure time to 5 to 9 months. Prove your chamber on a boned leg before attempting a traditional bone-in one.
What is bone sour and how do I avoid it?
Bone sour is spoilage deep in the muscle around the femur and aitch bone when salt does not penetrate before bacteria grow. Avoid it by salting cold at 1 to 4°C, packing salt hard into the bone pockets, allowing enough salting days for the leg weight, or simply boning the leg out.
Related Guides
- How to Make Prosciutto at Home: Step by Step
- Curing a Whole Ham at Home
- Prosciutto Salt Coverage Guide
- Prosciutto Drying Room Conditions
- Boneless vs Bone-In Prosciutto
- Prosciutto Troubleshooting Guide
- Whole Muscle Charcuterie: The Complete Guide