How to Cure Lardo at Home: A Complete Guide to Curing Fat
July 3, 2026

To cure lardo at home you salt a slab of pork back fat at least an inch thick, hold it cold under salt and aromatics for one to three weeks, then age it at cellar temperature (around 12–15 °C) and 75–80% humidity until it turns silky and translucent. Unlike a lean coppa that sheds 35% of its weight, pure back fat barely moves on the scale — so firmness and salt equalization, not a dramatic weight-loss curve, tell you it is ready.
I have run converted-fridge curing chambers in Sweden for years, and back fat is the cut most people cure by accident — trimming it off a belly or a loin and throwing it away — without realizing it is the product itself in three of Europe’s oldest preparations. Lardo, salo, and cured fatback are all the same idea handled three different ways. This guide covers the whole track: choosing and sourcing the fat, salting method, whether you need cure #2, the aging envelope, and how to tell when a slab of nearly pure fat is actually done. It is the hub for a set of deeper guides — each linked in context below — on comparing the three methods, sourcing the right fat, and everything that follows.
What Lardo, Salo, and Fatback Actually Are
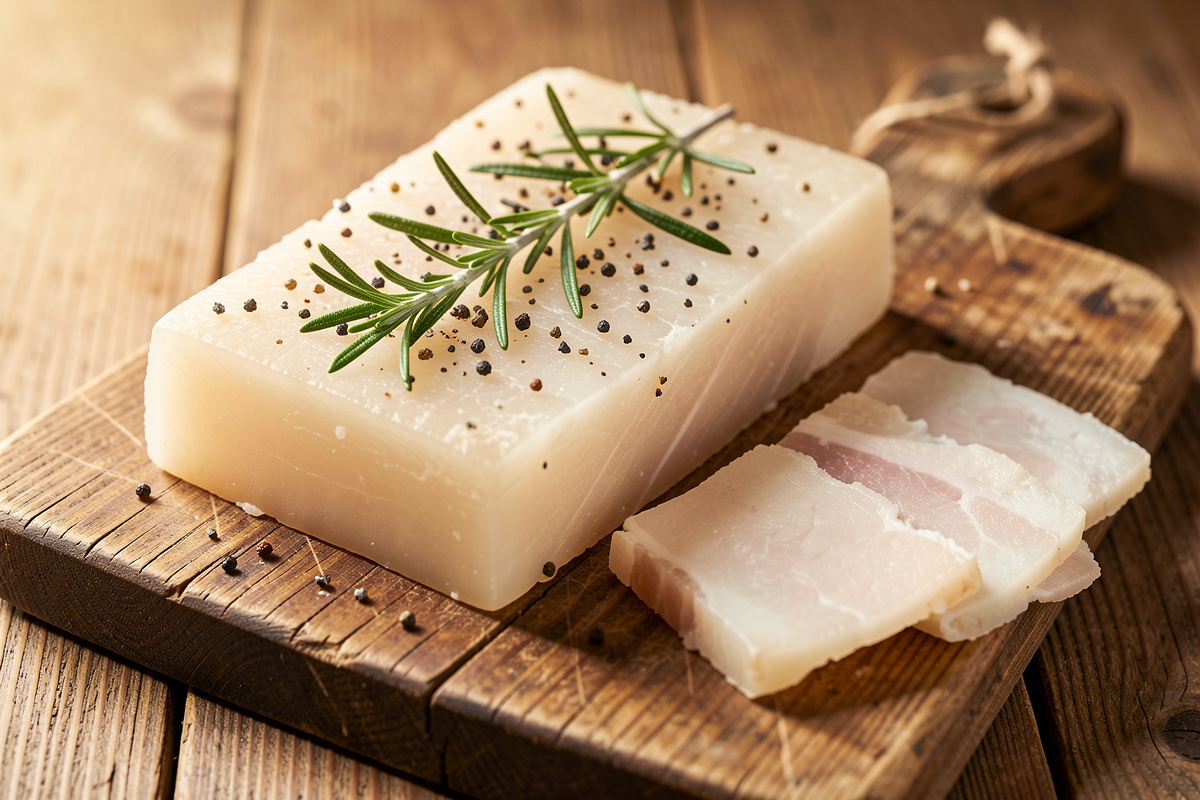
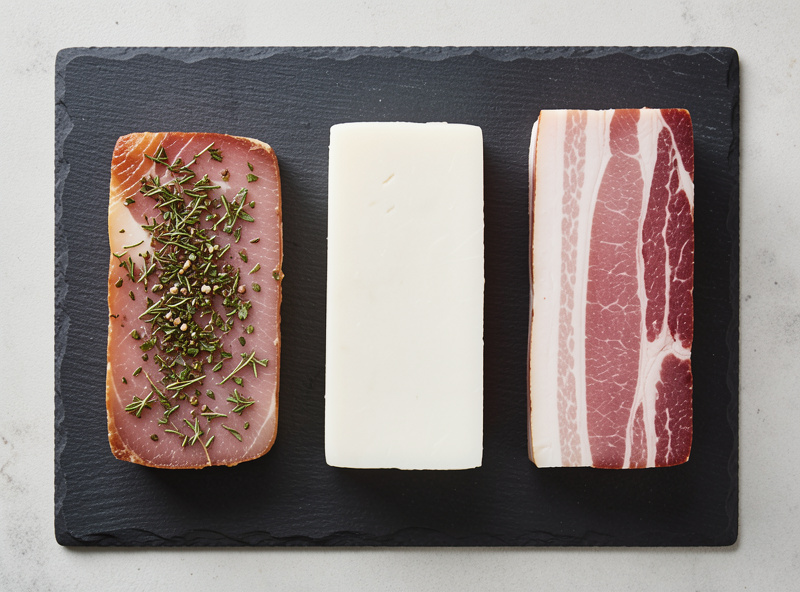
Lardo is Italian salt-cured pork back fat, aged for months until it is soft enough to melt on warm bread. Salo is its Slavic cousin — salt-cured back fat from Ukraine, Poland, and Russia, usually eaten cold and firm, often frozen. Fatback is simply the cut: the hard subcutaneous fat that runs down a pig’s spine, and it is the raw material for both. The difference between the three is not the meat — it is the salt level, the aromatics, and how long and cold you hold it.
The reason back fat gets its own track on this site, separate from the belly bacon and whole-muscle guides, is that it behaves nothing like lean meat in the chamber. Muscle is roughly 75% water; back fat is closer to 90% lipid and holds very little moisture. That single fact rewrites almost every rule you learned curing a bresaola or a coppa — the drying is slower, the weight barely changes, and the failure mode is rancidity rather than the wet core you fight in a salami. I get into the sourcing details in the guide on the best fat for lardo and where to buy it, but the short version is that you want the firm, dense back fat off the shoulder end, at least an inch thick, ideally more.
Do You Need Cure #2 for Lardo and Salo?
This is the question that separates honest charcuterie writing from recipe-blog hand-waving, so I will not hedge it. For back fat that is dry-cured and held at cellar temperature for weeks to months — the way real lardo is made — I use and recommend cure #2 at the standard rate of 2.5 g per kilogram of fat (0.25%). Cure #2 supplies both sodium nitrite and sodium nitrate, and the nitrate is what protects a long, slow cure held cool for a season — the same nitrite/nitrate distinction the University of Georgia’s National Center for Home Food Preservation draws between short cures and extended dry-curing.
Why bother, when Colonnata lardo has been made with salt alone for centuries? Two reasons, and both are about the specific chemistry of fat. First, lardo and salo are almost always packed with garlic, and garlic can carry Clostridium botulinum spores. Bury that garlic in a dense, low-oxygen fat matrix and hold it warm, and you have built the exact anaerobic environment botulism likes — the CDC’s botulism prevention guidance flags garlic in oil and low-oxygen home preparations for exactly this reason. Second, home cellars are not marble caves in Tuscany with a stable microclimate — a converted fridge that drifts warm on a hot week is a different risk profile. Cure #2 is cheap insurance against a toxin you cannot see, smell, or taste. If you want the full reasoning, I wrote a dedicated piece on Cure #1 versus Cure #2 and another on what pink salt and nitrates actually do.
The one honest exception is traditional salo made the Ukrainian way: heavily salted, cured cold in the refrigerator, then stored frozen and eaten within weeks of thawing. Cold cure plus frozen storage is itself a control — botulinum does not grow at freezer temperatures. That tradition works, and I explain exactly how to run it safely in the guide on making salo. But if your fat is going to hang at cellar temperature for two months, use cure #2. Never treat “natural, no-nitrate” as a free pass on a long, warm, garlic-laden cure. When you are unsure, take the conservative path — this is the one hobby where a confident wrong number is genuinely dangerous, which is also why I keep hammering botulism prevention across this site.
The Salt Box vs Equilibrium Method
You have two ways to get salt into a slab of fat, and I use both depending on the piece. The salt-box (cover) method is the traditional lardo approach: you bury the fat completely in coarse salt, herbs, pepper, and garlic, and let it sit under that blanket in the cold. Fat cannot over-salt easily the way lean meat can, because it absorbs salt slowly — so a week or two buried in salt firms the surface and seasons it without turning it into a brick. This is forgiving and authentic, and it is how I make lardo I intend to age long.
The equilibrium cure is the precise-weight method: you weigh the fat and add exactly 2.5–3% salt and 0.25% cure #2 by weight, seal it in a vacuum bag or a tight crock, and let the salt redistribute evenly with nowhere to over-concentrate. This is what I reach for when I do not have a marble box, when I want a repeatable salt level, or when I am curing in a small space. The equilibrium approach is the backbone of the guide on curing lardo without a marble box — the vac-bag and crock methods that most home curers actually have room for. Both routes end in the chamber; the salt method just changes the first two weeks.
| Method | Salt Application | Cure #2? | Salt Phase | Best For |
|---|---|---|---|---|
| Salt box (Colonnata style) | Buried in coarse salt + aromatics | Recommended for long aging | 1–3 weeks cold | Long-aged lardo, traditional texture |
| Equilibrium (vac-bag) | 2.5–3% salt + 0.25% cure #2 by weight | Yes | 2–3 weeks in bag, fridge | Repeatable results, small spaces |
| Equilibrium (crock/marble) | Weighed salt, packed and pressed | Yes | 2–3 weeks cold | Batch curing, layered slabs |
| Salo (Ukrainian) | Heavy salt rub, packed tight | Optional (cold + frozen storage) | 3–14 days fridge | Firm, cold-eaten, frozen storage |
Building the Aging Envelope
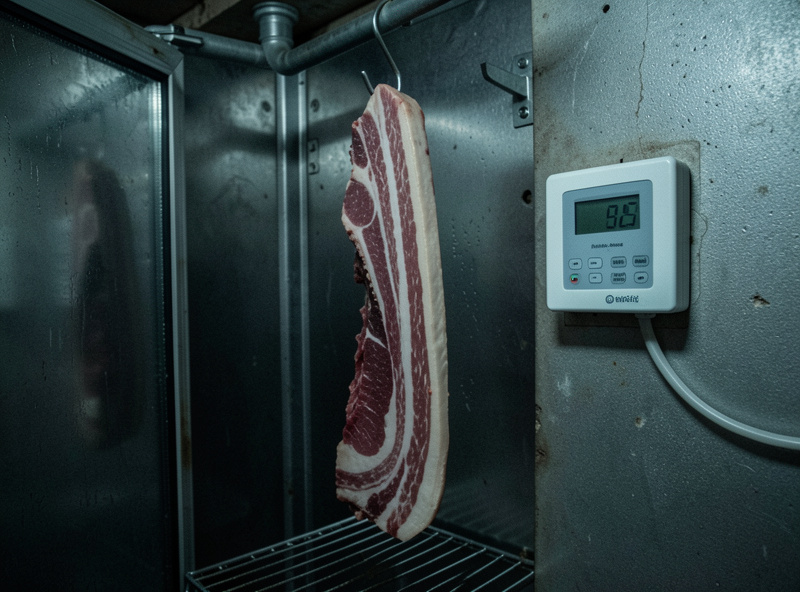
Once the salt phase is done, lardo goes into the same envelope I hold everything else at: roughly 12–15 °C and 75–80% relative humidity, with gentle air exchange. In my primary chamber that means an Inkbird ITC-308 on the compressor side, an IHC-200 handling humidity, and a slow 120mm fan cycling five minutes on, twenty-five off. If you are still building your setup, I walk through the whole thing in the guides on choosing a chamber controller and humidifier selection.
Here is where fat rewrites the rules. With lean whole muscle, case hardening — a dry outer shell trapping a wet core — is the enemy, and you fight it with humidity. Fat barely dries at all, so case hardening is a non-issue; a lardo slab will not develop the hard ring that ruins a rushed salami. What you are actually managing during the aging phase is oxidation. Exposed fat surfaces slowly go rancid, especially if light and moving air hit them, which is why traditional lardo is kept packed under salt or oil and why I keep mine covered and in the dark. That is also the whole subject of the guide on rancidity in cured meats. Air exchange still matters — you want to clear off-gassing and keep surface moisture from pooling — but you dial the fan gentler than you would for a fermented sausage.
How gentle is a judgment call I make with data, not a fixed setting. I keep a SensorPush HT.W at meat-shelf height as the trusted reference and cross-check it against a second logger down in the coil zone, both salt-test calibrated, and surface the curves through Home Assistant so a drift shows up as a line on a chart rather than a ruined slab. On a lardo I run the 120 mm fan on its shortest useful cycle — five minutes on, twenty-five off is my baseline — and if I see surface moisture beading or the aromatics starting to weep, I shorten the off-interval a touch rather than cranking the fan speed, because a hard draft blowing straight across exposed fat drives oxidation faster than it clears moisture. In a Swedish winter the cold, dry ambient does half that work for me; in a damp summer the humidity controller earns its keep.
How Long, and How to Know It Is Done
Lardo is a patience project even by charcuterie standards. After the salt phase, I hang mine in the chamber for a minimum of six to eight weeks, and the best slabs go three to four months. It comes out when the fat has turned from opaque white to faintly translucent, feels dense and waxy rather than soft, and the salt has equalized so no single bite is sharp. The full timeline, with the checkpoints I use week by week, is in the guide on how long to cure lardo.
The doneness signal is where back fat breaks from everything else on this site. On a coppa or a bresaola, I trust the scale — a 30–40% weight loss is the honest endpoint. Pure fat holds so little water that it simply cannot lose that much; a finished lardo might shed 10–15% over months, and the curve flattens fast. So I do log the weight — I log the weight on everything — but for fat I read it as a supporting signal, not the verdict. The verdict is firmness, translucency, and even salt. If you have only ever cured lean muscle, resetting that expectation is the single most useful thing this guide can give you.
When Fat Goes Wrong: Yellow, Rancid, and Off
The classic scare with cured fat is that it turns yellow, and the classic mistake is throwing out a perfectly good slab because of it. Some yellowing is normal aging — fat oxidizes slowly and deepens in color the way old ivory does, and a faint straw tint on well-kept lardo is fine. What is not fine is a sharp, crayon-like or paint-thinner smell, a greasy slick, or a bitter taste: those are rancidity, the fat’s own fats breaking down, and no amount of trimming saves it. I pull the two apart in detail — nose test, color test, texture test — in the guide on why lardo goes yellow.
The other failure is surface mold. A powdery white bloom is usually the same friendly Penicillium you see on a salami and wipes off with vinegar-damp cloth; fuzzy black, green, or “spider-web” growth means the piece went somewhere it should not have, and when in doubt I throw it out rather than eat through it. Good chamber hygiene, steady humidity, and not crowding the shelves prevent almost all of it. This is standard charcuterie food safety, and fat is no exception.
Serving Lardo and Salo
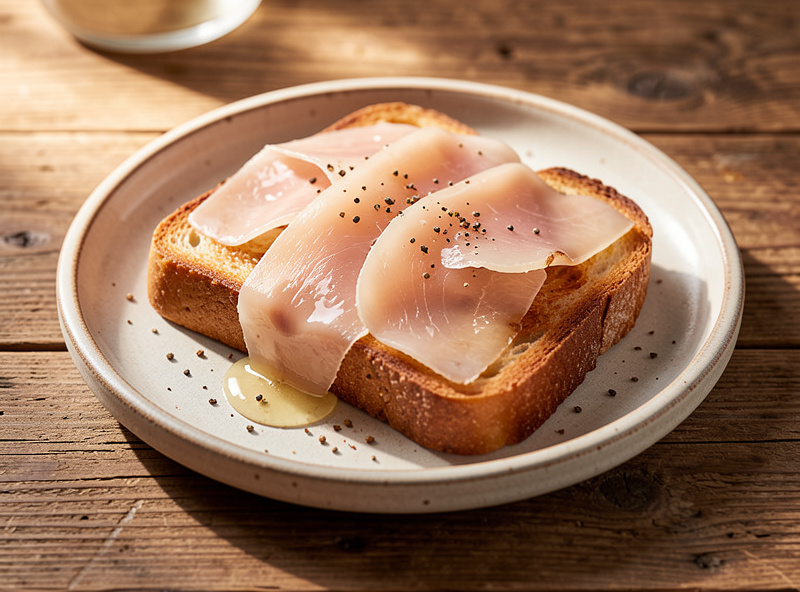
Finished lardo is a texture, and temperature is everything. Sliced paper-thin and laid on warm toasted bread, it goes from waxy to liquid on your tongue in seconds — that is the entire point. Sliced thick and cold, the same lardo is disappointing and greasy. I keep the slab cold right up until slicing, cut it as thin as the knife allows, and let the plate come up to cool-room temperature before serving. Salo is the opposite convention: it is eaten firm and cold, cut into slabs with black bread, garlic, and a shot of something. The full method — knife choice, thickness, temperature, what to pair it with — is in the guide on how to slice and serve lardo, and the general paper-thin slicing technique applies here too.
If you have made cured fat before only as a byproduct — the fatback you saved to grind into a pancetta or render for a confit — treating it as the finished product itself is a genuinely different craft. It is closer to how I approach guanciale than to bacon, because the fat is the flavor rather than the frame around lean meat.
A Step-by-Step Lardo, Start to Finish
Here is the process I run on a typical two-kilogram slab, so the pieces above connect into one workflow. Start with firm back fat at least an inch thick, skin removed, squared into an even slab so it salts uniformly. Weigh it — the number matters, because everything else is a percentage of it.
For an equilibrium cure, measure 2.75% salt and 0.25% cure #2 by the fat’s weight, plus your aromatics: cracked black pepper, a few smashed garlic cloves, bay, rosemary, and a little sugar to round the salt. Rub the mix over every face, pressing it into the surface. Seal the slab in a vacuum bag, or pack it tight in a crock with the cure that falls off, and refrigerate at 3–4 °C. Turn it every few days and redistribute any liquid that pulls out. After two to three weeks the fat is firm and evenly seasoned — that is the end of the salt phase.
Rinse the surface, pat it fully dry, and hang or shelf it in the chamber at 12–15 °C and 75–80% humidity. Log the starting weight. Now you wait — six to eight weeks minimum, longer for depth. Check weekly for surface mold (wipe any bloom with a vinegar-damp cloth), confirm the aromatics have not gone slimy, and feel for firmness. When the slab is dense, faintly translucent, and evenly salted throughout, it is done. Vacuum-seal what you will not eat within a couple of weeks and keep the rest cold. That single workflow, scaled up or down, is every lardo I have ever made.
Flavoring: Herbs, Garlic, and Pepper
Back fat is a nearly blank canvas, which is exactly why the aromatics matter more here than on a heavily muscled cut. Traditional Colonnata lardo leans on rosemary, garlic, black pepper, and sometimes cinnamon, nutmeg, or star anise packed into the salt. I keep mine simpler — rosemary, bay, garlic, and a generous crack of pepper — because I want the fat’s clean sweetness to lead. Whatever you choose, add it during the salt phase so it has weeks to migrate inward; sprinkling herbs on at the end only seasons the surface.
The one aromatic that carries a safety footnote is garlic, for the reason covered above: raw garlic in a low-oxygen fat matrix is a botulism consideration on a long, cool cure, which is another vote for cure #2 whenever garlic is in the mix. Salo makers often go heavier on garlic still, and they get away with it because the salo is kept cold and frozen rather than aged warm. Match your flavoring ambition to your storage plan, not the other way around.
Storing Finished Lardo and Salo
A finished slab keeps well, but fat’s enemy never sleeps — oxidation continues even after the cure is done. I store lardo vacuum-sealed or wrapped tight in parchment and then foil, kept cold and dark, and it holds its quality for a couple of months in the fridge and far longer frozen. Freezing does not hurt the texture of cured fat the way it can bruise a delicate fresh cut, which is precisely why the salo tradition relies on it. Salo, in fact, is meant to live in the freezer: cut it into blocks, wrap each one, and pull a block out to slice frozen-firm as you want it.
The mistake I see most is storing cured fat loosely in the fridge, exposed to air and light on an open shelf. That is the fast track to the rancid, crayon-smelling slab that gets thrown out and blamed on the cure. Keep it sealed, keep it cold, keep it dark, and back fat is one of the most durable things you will ever make. If you monitor your chamber and storage the way I do — logged temperature and humidity surfaced through a smart-home hub — you will catch a warm drift long before it costs you a slab.
Related Guides in This Cluster
- Lardo vs Salo vs Fatback: Three Ways to Cure Pork Fat
- Best Fat for Lardo: Back Fat Thickness and Where to Source It
- Curing Lardo Without a Marble Box: Vac-Bag and Crock Methods
- How to Make Salo: Ukrainian Salt-Cured Pork Fat
- How Long to Cure Lardo: Salt-Box Timeline and Weight Check
- Why Did My Lardo Go Yellow? Rancid Fat vs Normal Aging
- How to Slice and Serve Lardo Paper-Thin
Frequently Asked Questions
Do I need cure #2 to make lardo at home?
For dry-cured lardo aged at cellar temperature for weeks to months, yes — use cure #2 at 2.5 g per kilogram of fat. It protects a long, cool cure and offsets the botulism risk of garlic buried in low-oxygen fat. Only cold-cured, frozen-stored salo can safely skip it.
How long does it take to cure lardo?
Plan on one to three weeks in the salt phase, then a minimum of six to eight weeks aging at 12–15 °C, with the best slabs going three to four months. Fat cures slowly because it holds little water, so patience, not speed, defines the result.
Does lardo lose 30 percent of its weight like other cured meat?
No. Pure back fat holds so little water that a finished lardo typically loses only 10–15 percent over months. Weight loss is a supporting signal for fat, not the doneness verdict — firmness, translucency, and even salt tell you it is ready.
What is the difference between lardo and salo?
Both are salt-cured pork back fat. Lardo is the Italian version, aged for months until soft enough to melt on warm bread. Salo is the Slavic version, salted heavily, cured cold, kept firm, and usually eaten cold and frozen rather than aged long.
Is yellow lardo safe to eat?
A faint straw tint from slow oxidation is normal aging and fine. A sharp, crayon-like or paint-thinner smell, a greasy slick, or a bitter taste means the fat has gone rancid — that is not salvageable and should be discarded. Judge by smell and taste, not color alone.
What thickness of back fat do I need for lardo?
Use firm back fat at least one inch thick, and thicker is better — the dense fat off the shoulder end is ideal. Thin, soft, or belly fat does not cure into proper lardo texture and is better used for pancetta or rendering.