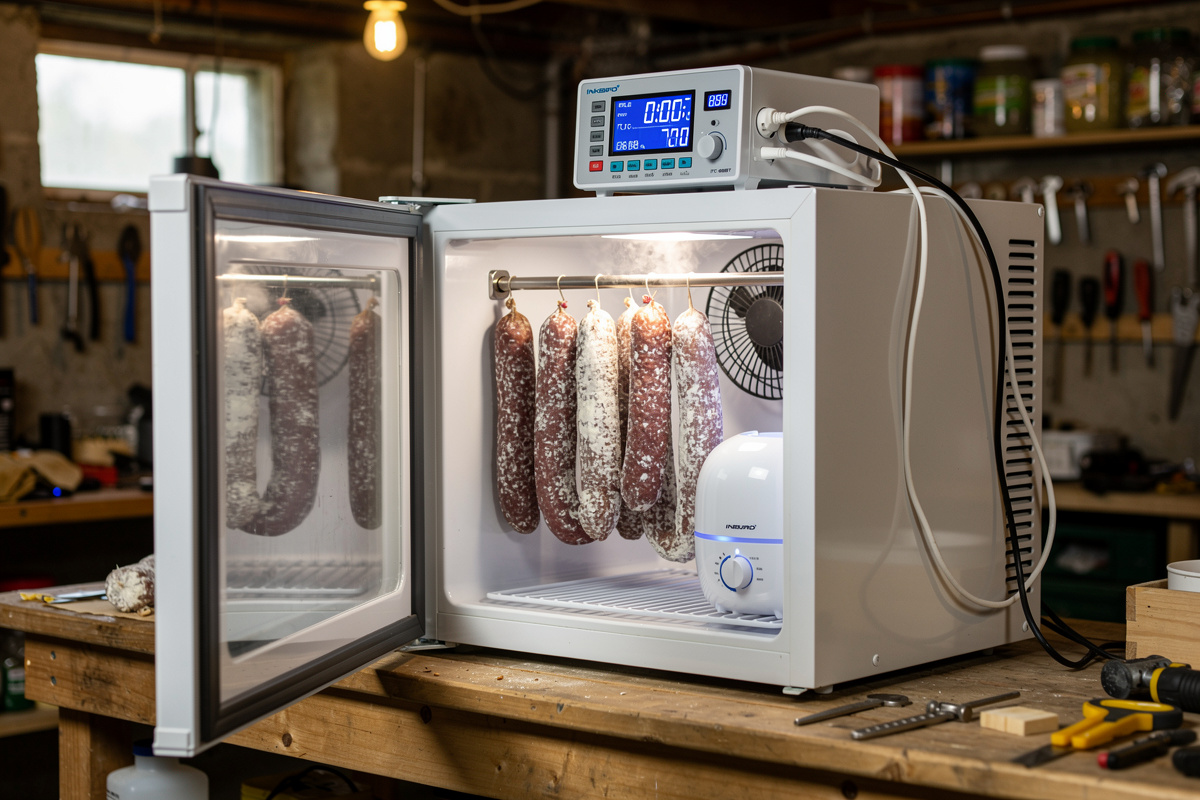

I spent $176 on my first DIY curing chamber: $35 for a 4 cu ft Magic Chef mini fridge off Facebook Marketplace, $35 for an Inkbird ITC-308 temperature controller and $45 for an Inkbird IHC-200 humidity controller run as a pair, $28 for a Pure Enrichment MistAire ultrasonic humidifier, $14 for a USB clip fan, and roughly $19 for a stainless rod and S-hooks from a restaurant supply place.
New equipment for the same build runs $295 to $440, mostly because a new compact fridge alone is $150 to $220. Total operating cost on mine averages $7 a month in electricity at the $0.15/kWh I pay in Sweden converted to US-equivalent rates.
This is the actual itemized cost from my own basement build, not a theoretical parts list. I’ll show what each component does, what I tried first that failed (the no-name eBay controller saga lost me a three-week duck breast), and which corners are safe to cut versus the ones that ruin a 6-month prosciutto. The plan slots into the broader complete curing chamber build guide if you want the full assembly walk-through.
The used-fridge route is the difference between charcuterie as a $200 hobby and a $400 hobby. A 5-year-old mini fridge works identically to a brand-new one for curing-chamber service — the compressor cycles less than it did chilling beer because the chamber sits at 55°F, not 38°F. My Magic Chef was already 7 years old when I bought it, and 18 months in, the duty cycle is still around 25%.
The $200 Build: Itemized
| Component | Spec | Used Price | New Price | Why You Need It |
|---|---|---|---|---|
| Mini fridge or wine cooler | 3 to 5 cu ft, working | $30 to $60 | $150 to $220 | Insulated chamber + active cooling |
| Inkbird ITC-308 controller | Dual-stage temperature only | $20 to $30 | $30 to $40 | Cycles fridge compressor on/off |
| Inkbird IHC-200 controller | Dual-stage humidity only | $30 to $45 | $45 to $60 | Cycles humidifier/dehumidifier on/off |
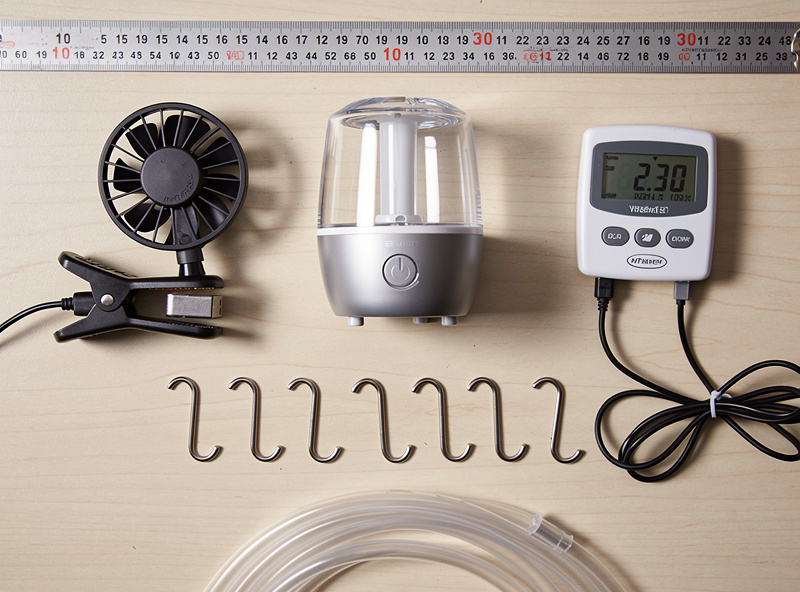
| Ultrasonic humidifier | 1 to 2 liter tank | $25 to $40 | $25 to $40 | Adds moisture when RH drops |
| Chamber fan | USB or 12V, low CFM | $10 to $20 | $10 to $20 | Air circulation, prevents stagnation |
| Stainless steel rod + hooks | 1/4″ rod, 6 to 10 hooks | $15 to $25 | $15 to $25 | Hanging hardware for chubs |
| Hygrometer (backup) | Wireless, ±2% accuracy | $10 to $20 | $10 to $20 | Verifies controller probe accuracy |
| Misc (cord clamps, sealant, ties) | Cord clamps, silicone, ties | $10 to $15 | $10 to $15 | Wiring management |
| Total | Complete kit | $150 to $255 | $295 to $440 | Build cost summary |
The “I spent $200” claim assumes you find a $35 fridge and don’t double-buy on hygrometers (I did — bought a SwitchBot after my probe drifted, that’s not in the $176). Realistic budget range is $150 (cheapest used) to $255 (mid-range used). Below $150 the corners cut start showing up: dial humidifier instead of ultrasonic (overshoots constantly), one controller doing double duty by hand instead of two dedicated ones (unreliable humidity control), no backup hygrometer (can’t catch a drifting probe).
Where to Find the Used Mini Fridge
Facebook Marketplace and Craigslist are the standard sources. Search for “mini fridge,” “compact refrigerator,” “dorm fridge,” or “wine cooler” in your local area. Filter for working units priced $30 to $80. College-town listings spike in May and August when students move out — best deals of the year, often $25 to $40 for working units that are 1 to 3 years old. I bought mine on Marketplace in late May from a graduating student for $35; the listing had been up six hours.
Wine coolers (thermoelectric or compressor) work as well as mini fridges and often cost less because demand is lower. Avoid older absorption-cycle wine coolers (no compressor visible) — they’re slower to recover temperature after door opens and use more electricity. Compressor-driven units are what you want.
Test before buying: plug it in for 30 minutes, let it reach steady state, check the interior is below 50°F. If the seller objects to a 30-minute test, walk away — they likely know it has a problem. A unit that won’t reach 50°F has a refrigerant leak and isn’t fixable for the price you’d pay. The first fridge I tried to buy wouldn’t drop below 58°F after 40 minutes; I left without it. The fridge selection step is covered in detail in the how to convert a fridge into a curing chamber guide.
Why I Run Two Separate Controllers Instead of One Combo Unit
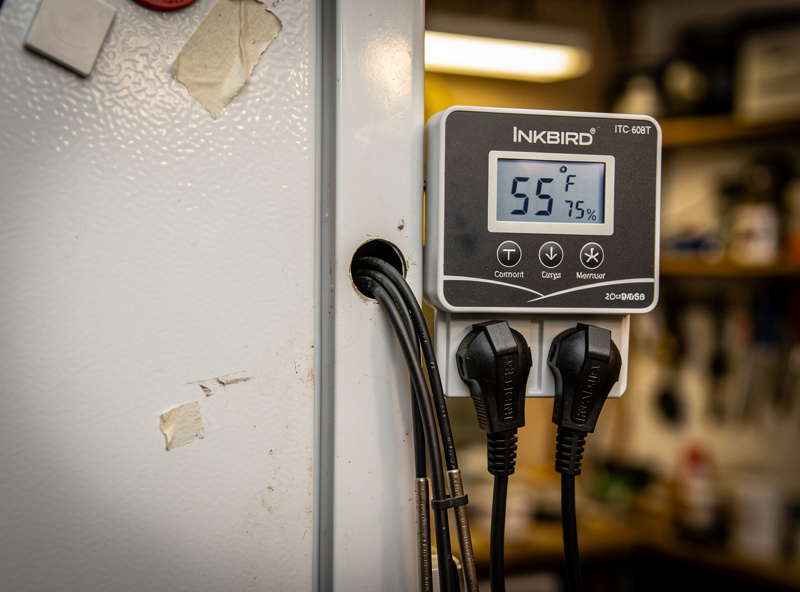
A curing chamber needs to control two variables independently: temperature (turn the fridge compressor ON when too warm, OFF when too cool) and humidity (turn the humidifier ON when too dry, OFF when too humid). I run an Inkbird ITC-308 for the temperature side and a separate Inkbird IHC-200 for humidify/dehumidify, rather than one combined box — two independent relay loops instead of one controller juggling both. If the humidity side glitches or a probe drifts, it doesn’t touch the compressor cycle at all, and vice versa. The ITC-308’s differential is locked at 0.3°C minimum, which matched my Magic Chef’s compressor cycle without short-cycling the relay.
A combined temperature-and-humidity controller (the Inkbird ITC-608T is the common one) is a reasonable alternative if you’d rather run one box instead of two — it costs about the same as the ITC-308 and IHC-200 pair and saves some outlet space. I went the two-controller route because I’d rather troubleshoot one system at a time when something drifts, and it’s kept the two failure modes from ever compounding each other. If you want to dial in probe accuracy after install, the calibration steps in smart temperature and humidity sensors for curing chambers are worth following before the first cure.
Skip the cheap eBay no-name controllers. I tried this — bought a generic dual-stage unit for $32 because a matched pair of Inkbirds seemed expensive on my first attempt. The relay stuck closed (compressor-on signal latched) on day 19 of a duck breast cure. The chamber climbed to 65°F overnight before I caught it the next morning, and the duck went into the bin. That $40 in lost meat plus the $32 controller plus the $80 I then spent on a trusted Inkbird ITC-308 and IHC-200 pair taught me the lesson: reliable, independent controllers are the cheapest insurance on a $40 piece of meat. The cheap relays from no-name controllers fail within 2 to 5 cycles, and any drift damages a 6-month prosciutto cure permanently.
Humidifier: Ultrasonic vs Evaporative
Ultrasonic humidifiers (the cheap consumer kind from Walmart or Amazon) turn water into mist with a vibrating ceramic plate. They’re cheap ($25 to $40), quiet, and produce mist quickly. The downside is they leave white mineral residue (“white dust”) on chamber surfaces if you use tap water — switch to distilled water to avoid this, which adds $4 to $8 per month in distilled water cost. I learned this the hard way: my first month I used tap water from a hard-water well, and the inside of my chamber looked like it had been salted by week three.
Evaporative humidifiers (wick-and-fan style) cost about the same ($30 to $50) and don’t leave mineral dust. They’re slower to raise humidity and need more chamber space, but if your basement water is hard, evaporative is the long-term cheaper option. I’m planning to switch to an Aircare evaporative for my next build because the distilled water bill in Sweden runs the equivalent of $11 a month here, which adds up.
For most builds, an ultrasonic with distilled water is the standard combination. The Pure Enrichment MistAire ($35), Vornado EV100 ($45), and similar 1 to 2 liter tank units have multi-day runtime per refill in a small chamber. Avoid humidifiers smaller than 1 liter — refilling daily gets old fast. My MistAire goes 3.5 days between refills at the 70% RH setting.
Chamber Fan: The $15 Component That Matters Most
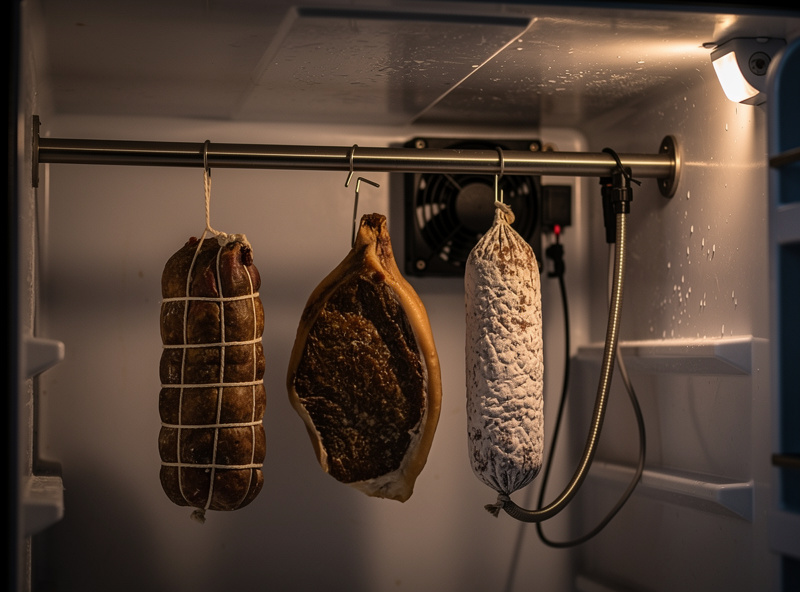
Stagnant air pockets in the chamber breed black mold, slow drying on the side facing the wall, and produce uneven cure. A small fan running 30 minutes per hour solves all three problems for the price of a sandwich. The first batch I cured without one had visible green-black mold on the back-facing side of a coppa within 9 days; nothing on the front. After I added the fan, the next coppa came out evenly bloomed.
USB-powered clip-on fans (the kind sold for personal cooling) cost $10 to $15 and run from any USB power adapter. 12V computer case fans wired to a wall-wart adapter cost about the same and are slightly quieter. Either works. Position the fan to push air across the chamber rather than directly at the meat — direct airflow on hanging cures causes case hardening within days, where the surface dries faster than the inside and seals moisture in.
Wire the fan to either run continuously (simplest) or to a smart plug with a schedule (30 minutes on, 30 minutes off, repeat). Continuous running uses about 2 watts and adds maybe $0.20 per month to electricity. The cycled approach prolongs fan life but the savings are negligible at this scale. I run mine on a smart plug schedule just because the SwitchBot was already there for monitoring.
Hanging Hardware
Stainless steel 1/4 inch rod is the cleanest hanging solution: cut to fit horizontally inside the chamber, drilled or clamped at both ends. Stainless S-hooks ($1 each) hang from the rod and hold the cure twine. Total hardware cost about $20 from any restaurant supply store or online. Look for NSF/ANSI 51-certified food contact stainless if you can; the markup is small and the certification rules out the lower-grade alloys that pit in salt environments.
Avoid galvanized steel rod — the zinc coating reacts with the salt environment and discolors over time. I made this mistake on my first prototype with a hardware-store galvanized rod; within two months the rod had black-grey discoloration and the underside of one S-hook was flaking. Avoid coated wire (vinyl-coated closet rod) — the coating can off-gas at chamber humidity levels. Stainless 304 or 316 is the standard.
For a wine cooler chamber where the original glass shelves are still installed, you can use the existing shelf rails to hang from. Drill small holes through the rails or use the original rail tabs to hold a horizontal rod. This is the cleanest install in a wine cooler.
What You Don’t Need (Optional Upgrades)
UV light: Marketed as a “germicidal” addition for curing chambers. Unnecessary for properly inoculated charcuterie because the white mold starter culture handles surface biology. Skip the $25 UV bulb until you’ve cured 5+ batches successfully without it. I never installed one and have not had a contamination event in 18 months of running the chamber.
Air circulation through the door (drilled vents): Unnecessary in a properly working chamber. The door’s natural seal failures provide enough air exchange. Drilling vents loses temperature stability and adds black mold risk if humidity drops too fast.
Wireless remote temperature/humidity monitoring: Nice to have ($30 to $50 for SwitchBot or similar), useful if your chamber is in a basement you don’t visit daily. Not critical for the build itself — the Inkbird display is local. I added a SwitchBot Hub 2 four months in because my chamber lives in an unheated basement room and the trip downstairs to read the display was getting old.
Premium sausage stuffer or grinder: These are upstream of the curing chamber, not part of the chamber itself. Buy them separately as you scale up production. The $50 hand grinder and $80 vertical stuffer are starter kit; $400+ commercial gear comes after 20+ batches.
Operating Cost: Electricity and Consumables
A 4 cu ft mini fridge curing chamber pulls about 30 to 60 watts average. Inkbird controller adds 2 watts continuous; ultrasonic humidifier draws 25 watts when running (about 25% duty cycle). Total average draw 50 to 80 watts, or roughly 1.5 to 2 kWh per day. At US average $0.15/kWh, that’s $7 to $9 per month. My SwitchBot plug logs my Magic Chef at 1.7 kWh/day average over 6 months, which lines up.
Distilled water: 1 to 2 gallons per month for the humidifier ($1 to $4 from a pharmacy). White vinegar for occasional mold wipes: 1 quart bottle lasts a year ($3 once). Mold starter culture (Bactoferm Mold-600): $15 lasts 10+ batches. For shelf-stable fermented sausage you’ll also want to hit the standard dry-sausage safety hurdles — pH down to roughly 5.0 to 5.3 and water activity down to about 0.85 to 0.91, per Pork Information Gateway’s sausage validation guidance — which is what makes the cure shelf-stable rather than refrigeration-dependent.
Total ongoing cost per batch: roughly $4 to $7 in electricity and consumables for a 6-month prosciutto cure. The amortized chamber cost over 5 years (assuming 4 batches per year) adds maybe $10 per batch. Total per-batch cost including operating is $14 to $17 — much cheaper than buying equivalent commercial dry-aged or cured product. The full operating economics including humidity-side power draw are covered in curing chamber climate control.
Upgrades to Consider After Year One
After your first 5 to 10 batches, you’ll know whether the hobby sticks. If yes, the upgrades that move the needle are: larger chamber (a 6 to 10 cu ft full-size mini fridge for $80 to $120 used, doubling your capacity), better humidifier (Aircare evaporative for $90 if mineral dust is an issue), and a separate UV-shielded fermentation chamber (small wine cooler for $50 to $80 used, lets you ferment salami at 70°F while curing chamber stays at 55°F).
The single biggest quality upgrade is splitting fermentation from curing into two separate chambers. Salami fermentation at 65 to 75°F competes with the 55°F curing temperature in a single-chamber setup, and fermentation either gets too cold (slow LAB activity) or curing gets too warm (rapid surface drying). Two cheap used chambers solve this for under $130 total, and the LAB pH-drop science from salami fermentation chemistry only works reliably when you can hold 70°F for 36 to 48 hours.
Don’t upgrade by buying a commercial pre-built curing chamber unit ($1,500 to $3,500). The performance gain over a $200 DIY build is marginal and the price increase is 10x. Keep the upgrade money for a second chamber, a vacuum sealer, or higher-grade hooks instead. The scaling-up question is treated in more depth in the complete curing chamber build guide.
Frequently Asked Questions
How much does it cost to build a curing chamber?
About 175 dollars with used parts: 35 for a used mini fridge, 35 for an Inkbird ITC-308 temperature controller, 45 for an Inkbird IHC-200 humidity controller, 28 for an ultrasonic humidifier, 15 for a chamber fan, 20 for stainless hardware. New equipment runs roughly 295 to 440 because a new mini fridge alone is 150 to 220 dollars.
Can I build a curing chamber for under 100 dollars?
Not reliably. The two Inkbird controllers (ITC-308 for temperature, IHC-200 for humidity) run about 80 dollars combined and are the most critical component. Cheaper no-name controllers fail relays within months and ruin entire batches. The minimum credible budget is about 150 with a free fridge and basic equipment.
Do I need a wine cooler or will a regular mini fridge work?
Both work. Wine coolers are sometimes cheaper used because demand is lower, and the temperature range matches curing chamber needs better than a kitchen fridge. Compressor-driven units (mini fridge or wine cooler) are what you want — avoid old absorption-cycle units.
How much electricity does a curing chamber use?
About 1.5 to 2 kWh per day for a 4 cu ft chamber, costing 7 to 9 dollars per month at US average electricity rates. Total per-batch operating cost including distilled water and consumables is 4 to 7 dollars.
Why run separate Inkbird controllers instead of one combo unit?
Running an ITC-308 for temperature and an IHC-200 for humidity keeps the two control loops independent, so a probe drift or relay fault on one side never touches the other. A combined unit like the ITC-608T is a reasonable alternative that costs about the same, but I’d rather troubleshoot one system at a time when something drifts. Cheap no-name combo controllers fail relays within months, which damages 6-month prosciutto cures permanently.
Should I get an ultrasonic or evaporative humidifier?
Ultrasonic for most builds — cheaper, faster, smaller. Use distilled water to avoid mineral dust (white residue on chamber surfaces). If your local water is hard and distilled water cost adds up, switch to evaporative for the long-term savings.
Related Articles
- How to Build a Curing Chamber: The Complete Guide
- How to Convert a Fridge Into a Curing Chamber
- Off-Grid Curing Chamber: Battery and Inverter Sizing
- Curing Chamber Climate Control: The Complete Guide
- Smart Temperature and Humidity Sensors for Curing Chambers