

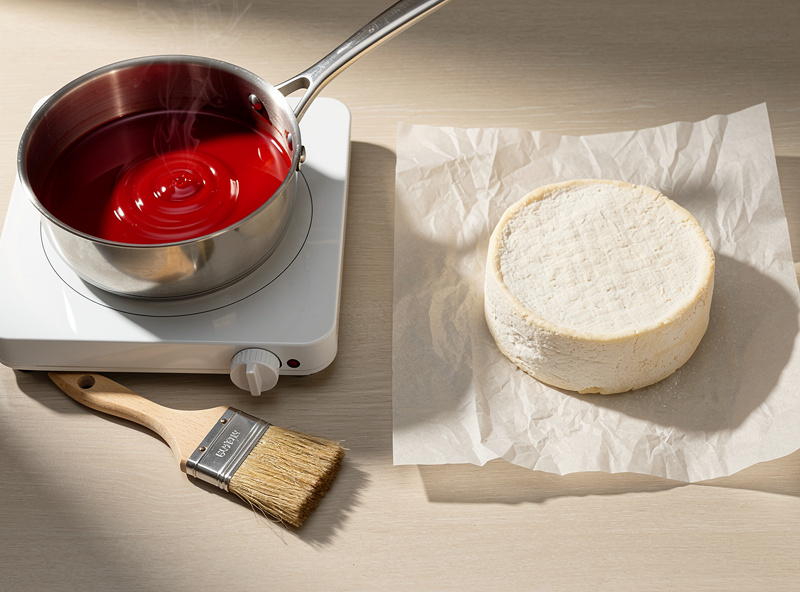
I keep a 1-pound block of red cheese wax from Hoegger and a dedicated $14 stainless saucepan reserved exclusively for waxing — never for cooking — on the same shelf as my chamber.
The pot heats to 220°F on the back burner of my induction range, and a 5-pound cheddar wheel takes me about 12 minutes start to finish for three thin coats. Wax cheese for aging by melting food-grade cheese wax in a dedicated saucepan to 220°F, brushing 2-3 thin coats onto a thoroughly dried cheese wheel that has formed a 5-7 day rind, allowing each coat to fully cool before applying the next. Properly waxed cheddar, gouda, and gruyere age 3-12 months in a 50-55°F cheese cave at 80-90% humidity without rind problems, mold contamination, or moisture loss issues. Wax is one of five aging methods covered in home cheese aging: the complete guide; choose between wax, bandage, natural rind, vacuum, and brine before you make the cheese.
Wax sealing is the most-used home cheese aging method because it produces consistent results across cheese styles and chamber conditions. The alternative — natural rind aging — requires a meaningfully larger investment in chamber humidity control, daily turning, and rind brushing. Wax handles all those problems by sealing the cheese against external conditions. The trade-off is appearance (waxed cheese lacks the artisanal natural-rind look) and the need to remove wax before slicing.
What Cheese Wax Actually Is
Food-grade cheese wax (petroleum wax approved under 21 CFR 172.886 specifically for use “on cheese and raw fruits and vegetables as a protective coating”) is a blend of paraffin and microcrystalline waxes designed to melt at 200-225°F, adhere to cheese surface without cracking, and remain flexible enough to handle minor cheese expansion during aging. Available in red, black, yellow, clear, and other colors. About 10-15 dollars per pound of wax; one pound coats roughly 6-10 cheese wheels depending on size.
Cheese wax characteristics:
- Melt point: 200-225°F: Pre-melted in a dedicated saucepan or double boiler. Standard kitchen heating works fine.
- Color options: Red is most traditional for aging cheddar, black for sharp/aged styles, yellow for gouda style, clear for unbleached looks.
- Reusability: Cheese wax can be remelted and reused 5-10 times without quality loss. Strain through cheesecloth between uses to remove cheese particles.
- Storage: indefinitely: Solid wax stores room-temperature without degradation.
- Differs from paraffin: yes: Pure paraffin cracks at cold temperatures; cheese wax includes microcrystalline component for flexibility.
- Differs from beeswax: yes: Beeswax is too soft for cheese aging and adds flavor.
- Where to buy: Hoegger Goat Supply, New England Cheesemaking Supply, and Amazon all stock food-grade cheese wax in 1, 5, and 10-pound blocks.
Skip the alternatives. Crayons, candle wax, and household paraffin all crack, melt incorrectly, or contain chemicals not safe for food contact. The 12-15 dollar block of real cheese wax produces 6-12 months of cheese aging supplies. Read about cheese aging fundamentals in our best cheese to age at home for beginners guide.
Cheese Preparation Before Waxing
The cheese must form a stable rind for 5-7 days at 50-55°F with 70% humidity before waxing. Wet or freshly-pressed cheese cannot be waxed — water trapped beneath the wax produces bacterial growth and “wet spot” failures within weeks; the UW-Madison Center for Dairy Research’s cheese storage safety guidance is built on the same water-activity logic — the more moisture available at the surface, the more potential there is for bacteria, yeast, and mold to grow, and their storage-safety guidance only applies to wax that stays uncut, uncracked, and undisturbed. The rind needs to feel firm and dry to a paper towel touch with no moisture transferring.
Pre-waxing rind formation:
- Salt and press the cheese: Either dry salting or brine bath. The salt draws surface moisture out and begins rind formation.
- Air-dry at 50-55°F for 5-7 days: Place on a wooden cheese board or stainless mat. Turn daily for even drying.
- Verify rind firmness: Press a clean dry paper towel against the cheese — no moisture should transfer. The cheese should feel firm and slightly leathery on the surface.
- Wipe surface with vinegar or alcohol: Removes any developing surface mold before sealing.
- Allow surface to dry completely: Vinegar or alcohol must fully evaporate (10-20 minutes) before waxing.
- Bring cheese to room temperature: Cold cheese causes wax to set too quickly and crack. Aim for 65-70°F cheese surface.
The 5-7 day rind formation is the most-skipped step. Many home cheese makers wax fresh cheese the same day pressing finishes, and the trapped moisture produces wet spot failures within 30-60 days. The rind formation is not optional — it is the foundation that makes waxing work.
As an Amazon Associate I earn from qualifying purchases.
The Waxing Procedure Step by Step
Wax cheese by melting wax to 220°F in a dedicated saucepan, dipping or brushing 2-3 thin coats onto the dry cheese surface, allowing each coat to fully cool and harden before applying the next, ensuring complete coverage with no gaps or thin spots, then aging in the cheese cave. Total active time per cheese wheel is 15-20 minutes.
Full procedure:
- Melt wax in a dedicated saucepan to 220°F: A double boiler is safer; direct flame works if using low heat and constant attention. Use a candy thermometer for accuracy.
- Bring cheese to room temperature: 65-70°F cheese surface allows wax to flow before setting.
- Test wax temperature with a small drop: The drop should spread slightly before setting solid. If it sets instantly, wax is too cold; if it pools liquid, wax is too hot.
- First coat: brush or dip: Apply a thin coat across the entire cheese surface. Cover edges, corners, and any cracks.
- Allow first coat to fully cool: 5-10 minutes at room temperature. The coat should feel firm and look opaque.
- Second coat: Apply over the first. Pay attention to any thin spots from the first coat.
- Third coat (optional but recommended): Especially for rectangular cheese with corners — corners are most prone to thin coverage.
- Inspect with a flashlight: Hold the cheese up to a light source. Any thin spots show as brighter areas. Patch with additional wax.
- Label the cheese: Date and type on a small paper note pressed onto the still-warm second or third coat. The label becomes embedded in the wax.
- Place in cheese cave: 50-55°F at 80-90% humidity for the planned aging period.
The dip method (lowering the cheese into the melted wax pot) produces faster coverage but requires more wax. The brush method uses less wax but takes longer per cheese. For first-time makers, brush is more forgiving — easier to spot missed spots before they become aging failures.
Cheese Cave Conditions for Waxed Cheese
Waxed cheese ages well at 50-55°F and 80-90% relative humidity for 3-12 months depending on style. The wax allows much wider chamber tolerance than natural-rind aging — brief humidity swings to 70% or 95% don’t cause problems because the wax seals against direct moisture transfer. Temperature stability matters more than humidity precision for waxed cheese.
Aging conditions and timelines:
- Cheddar (3-month): 50-55°F at 80% humidity. Mild flavor, firm texture.
- Cheddar (6-month): 50-55°F at 80% humidity. Sharp flavor begins; texture becomes crumbly.
- Cheddar (12-month): 50-55°F at 80% humidity. Pronounced sharp flavor, dry crumbly texture, possible amino acid crystals visible when sliced.
- Gouda (young, 2-3 months): 50-55°F at 85% humidity. Mild creamy.
- Gouda (aged, 6-12 months): 50-55°F at 85% humidity. Caramel notes develop, butterscotch flavor.
- Gruyere (mature, 6-12 months): 50-55°F at 85% humidity. Nutty complex flavor; small holes develop.
- Parmesan-style hard (12-24 months): 50-55°F at 80% humidity. Maximum flavor concentration; rock-hard texture.
For dual-purpose chambers also hosting charcuterie, run the chamber at 75% RH (the charcuterie target). Waxed cheese tolerates the slightly lower humidity better than natural-rind cheese would. Read about chamber humidity strategy in our humidity for dry aging beef vs charcuterie guide.
Common Waxing Mistakes
Six mistakes show up in nearly every first-time cheese waxing: skipping the rind formation period, applying wax too thick in single coat, missed spots in the wax coverage, waxing cold cheese (cracks form), reusing kitchen pans for wax (cross-contamination), and waxing damp or moldy cheese surfaces. Each one shows up as a failure mode within 30-90 days of aging.
Mistakes and corrections:
- No rind formation: Trapped moisture beneath wax produces wet spot bacterial growth. Always 5-7 days of rind formation.
- Single thick coat: Hairline cracks form as the wax cools. Multiple thin coats produce a more flexible seal.
- Missed spots: Tiny gaps in wax coverage allow mold ingress. Hold the cheese to a light source; patch any thin spots.
- Cold cheese surface: Wax sets immediately on cold cheese, producing brittle coatings that crack. Bring cheese to room temperature first.
- Shared kitchen pots: Wax cross-contaminates with food residues. Dedicate one saucepan to cheese wax only; thrift store $5-10 pans work fine.
- Waxing over surface mold: Pre-existing mold continues growing under wax and produces gas pockets that crack the wax. Wipe with vinegar before waxing.
- Forgetting to check the wax pot: Wax left on the burner for hours can degrade or even ignite. Use a thermostat-controlled burner or watch carefully.
- Applying wax in a humid kitchen: Steam from cooking nearby condenses on the cheese during waxing, producing flaws. Wax in a dry stable environment.
The reliable habit is to wax in a dedicated 30-minute time block — no other cooking happening, attention focused on the wax temperature and coverage. Most “rushed” wax jobs produce defective seals. Read about cheese-aging troubleshooting in our companion piece on best cheese to age at home for beginners.
The Wax I Actually Buy
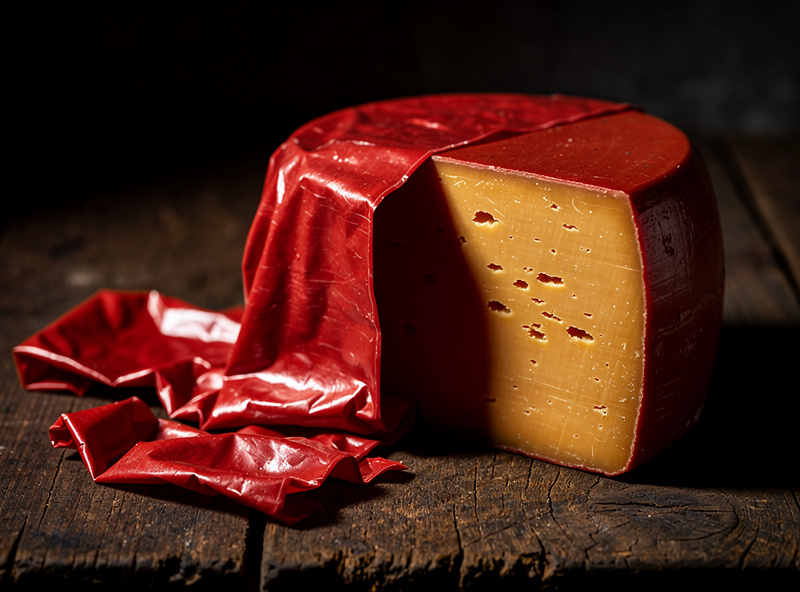
The wax I keep on the shelf is a food-grade red cheese wax — the same kind commercial dairies use on Gouda wheels. I buy it in 1-pound blocks for about $10-15, and a single block coats 15-20 pounds of cheese depending on how thick you apply it. Red is the traditional color because it is easy to see the wax coverage against a pale cheese, but the color is cosmetic; the wax itself is what matters.
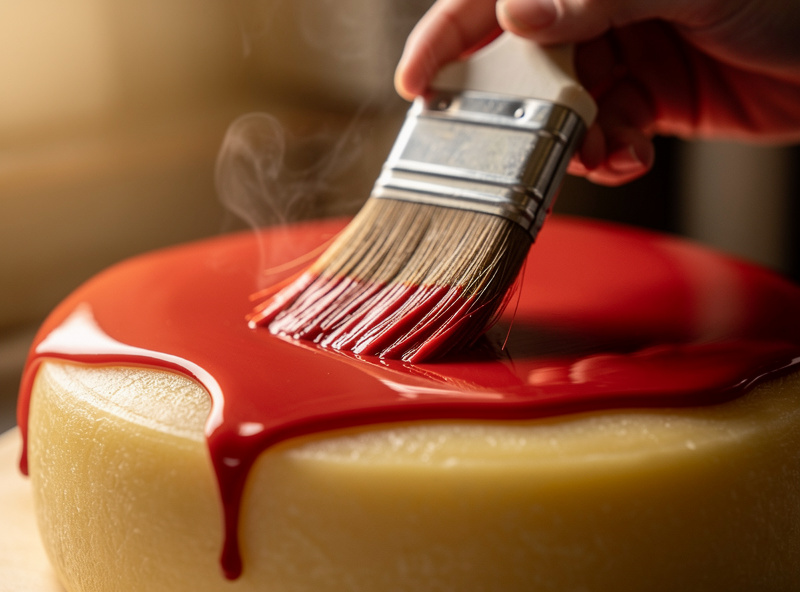
The brush matters as much as the wax. I use a natural bristle brush (not silicone) because natural bristles hold molten wax in the fibers and release it evenly on the downstroke. A silicone brush sheds wax in drips and leaves bare spots. Keep a dedicated brush for wax — once it is coated, you cannot clean it back to a food brush. Heat the wax to 200-220°F in a double boiler (never direct heat — cheese wax is flammable above 400°F) and apply two coats in opposite directions so pinholes from the first coat are sealed by the second.
Frequently Asked Questions
What temperature should I melt cheese wax to?
220°F (104°C) is the standard application temperature. Below 200°F the wax is too thick to brush evenly; above 240°F it starts to fume and degrade. Use a candy thermometer for precision rather than estimating.
How long should I age waxed cheddar?
3 months for mild cheddar, 6 months for sharp, 12+ months for very sharp. The wax allows aging for any length without rind concerns. Most home cheesemakers age cheddar 6-9 months as a sweet spot of flavor development versus patience.
Can I reuse cheese wax?
Yes — cheese wax remelts and reuses 5-10 times without quality loss. Strain through cheesecloth between uses to remove cheese particles. The wax does not lose its structural properties through normal melting cycles.
Why does my wax crack on the cheese?
Three causes: cheese was too cold during waxing, wax was applied in a single thick coat, or cheese expanded during aging more than the wax could accommodate. Solutions: room-temperature cheese, multiple thin coats, ensure cheese is fully dehydrated before waxing.
Can I use paraffin wax instead of cheese wax?
No — pure paraffin cracks at refrigerator temperatures. Cheese wax includes microcrystalline component for flexibility. Using paraffin produces brittle coatings that fracture during aging, allowing mold ingress. The 12-15 dollar cost difference is not worth the failure risk.
Do I need to remove the wax before eating?
Yes — peel away the wax before slicing the cheese. The wax is not edible. Save peeled wax in a clean container; remelt and reuse for future cheese batches. The cheese underneath should look like store-bought waxed cheese.
Related Articles
- Best Cheese to Age at Home for Beginners
- Humidity for Dry Aging Beef vs Charcuterie
- Convert a Fridge Into a Curing Chamber
- Case Hardening in Curing Chambers
- Curing Chamber Too Humid