

Casing preparation is the ten minutes that decide the next three months. Rinse and soak natural casings 30 minutes to an hour in lukewarm water, flush the lumen so it runs clear, keep everything under 4 °C at the stuffer, and pack pressure evenly. Get that right and blowouts, air pockets, and case-hardening mostly disappear. Get it wrong and you find out in week six.
I have stuffed a lot of sausage across the chambers I run in Sweden, and I can tell you the single most common cause of a ruined salami is not mold and not the ferment — it is a defect built in during the twenty minutes at the stuffer. An air pocket you did not prick becomes a grey ring of oxidised fat. A casing you soaked too little splits at the shoulder. A binding of twine tied too loose lets the piece drop off the dowel at 25% weight loss and land in the drip tray. None of that is bad luck. It is casing handling.
This guide is the map for the whole workflow: choosing a casing, prepping it, stuffing it without bursting, getting the air out, tying and netting it for even drying, and storing what is left. Each stage links to a deep-dive article where I walk the exact method, the numbers, and the mistakes I have personally made. Think of this page as the index; the spokes are the field manuals.
What Are the Main Types of Sausage Casing?
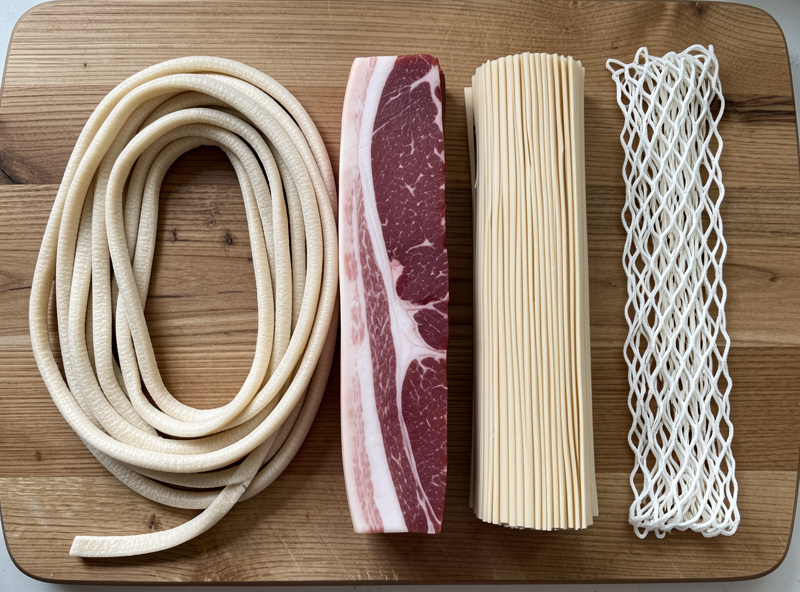
There are four families that matter for a home chamber: natural (hog, sheep, beef), collagen, fibrous, and the mesh netting you pull over a large piece. Natural casings breathe and take white mold beautifully; collagen is cheap and consistent but a different animal for dry-curing; fibrous is for cooked and semi-dry; netting is structure, not a casing at all. Pick by the diameter you want and whether the piece will hang for months or get cooked in a week.
The diameter you choose sets the drying time, because drying is a race between the surface losing water and the core catching up. A 38 mm hog-cased salami finishes in four to six weeks; a fist-thick beef-bung sopressata can take three to five months to hit 35% weight loss. Choose the casing before you grind, because the bind, the grind plate, and the cure calculation all follow from it.
| Casing | Typical diameter | Takes white mold? | Best use | Prep before stuffing |
| Sheep | 20–26 mm | Yes | Fresh breakfast links, cabanossi | Soak & flush 30–60 min |
| Hog (small) | 32–35 mm | Yes | Fresh sausage, thin salami, cacciatore | Soak & flush 30–60 min |
| Hog (wide) | 38–42 mm | Yes | Salami, kielbasa, chorizo | Soak & flush 30–60 min |
| Beef middle | 45–65 mm | Yes | Mid-size salami, sopressata | Soak & flush, check for pinholes |
| Beef bung | 90–120 mm | Yes | Big salami, mortadella-style, coppa wrap | Soak longer, inspect seams |
| Collagen | 19–55 mm | Poorly / no | Cooked & snack sticks; fast salami | No soak (most types) |
| Elastic netting | Sizes by stretch | N/A (structure) | Muscles & large salami support | None — apply over piece |
Notice the two things that separate the families: whether they take white mold (Penicillium nalgiovense needs a porous protein surface to colonise, which is why collagen so often stays bald), and how much prep they need before they touch the stuffer. Natural casings are shipped packed in salt and must be rehydrated and flushed. That is where the whole chain begins, so it is where the detail work starts.
How Do You Prepare Natural Casings Before Stuffing?
Rinse the salt off, soak the casings in lukewarm water (around 30 °C) for 30 to 60 minutes to make them supple, then flush the lumen by slipping one end over the tap and letting water run right through until it comes out clear. That flush does two jobs: it opens the casing so it slides onto the horn, and it finds the pinhole leaks before your farce does.
The water temperature matters more than people think. Cold water leaves the casing stiff and prone to splitting; genuinely hot water can par-cook the collagen layer and make it fragile. Lukewarm is the window. I keep a bowl at hand temperature, change it once during the soak, and never rush this — a casing that is not fully hydrated is a casing that tears at the first tight twist. The full method, including how to spot a weak section and how much casing to prep per kilo of meat, is in how to soak and flush natural hog casings the right way.
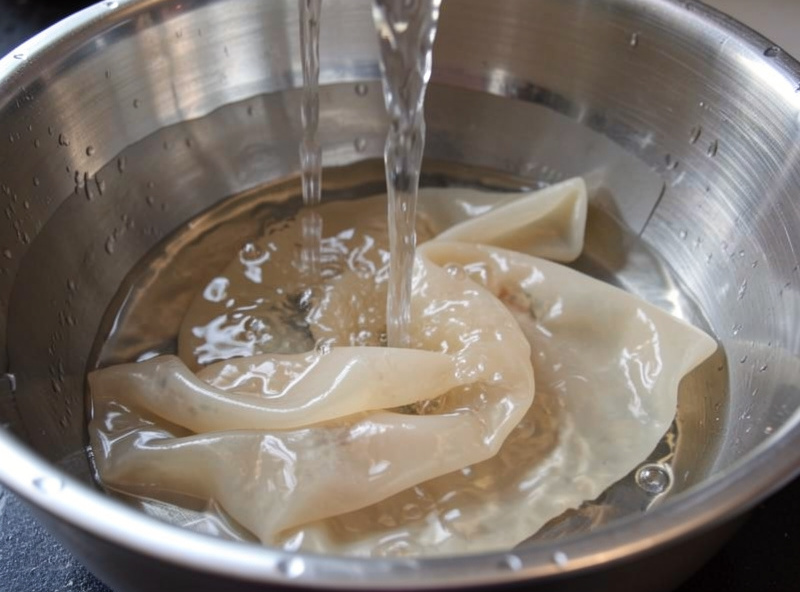
One habit that saved me years of frustration: run the flush water through and watch the far end. If it beads and sprays sideways anywhere along the length, you have found a pinhole. Mark it, cut around it, and you will not discover it later as a blowout mid-stuff. Prep is quality control disguised as a chore.
Why Do My Casings Keep Bursting While Stuffing?
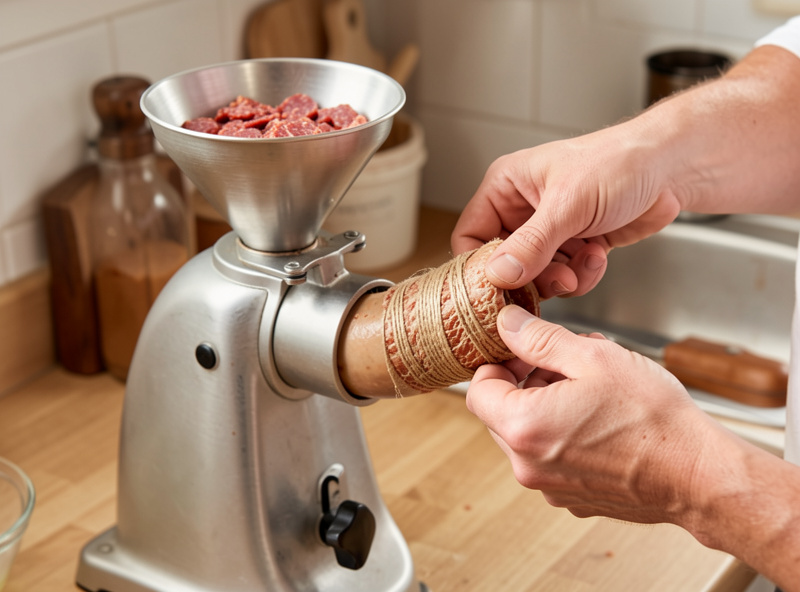
Casings burst for three reasons, almost always in this order: the meat is too warm and smears, the stuffing pressure is uneven, or the casing was under-soaked and brittle. Keep the farce below 4 °C, fill at a steady slow pace with no trapped air jerking the horn, and hydrate the casing fully — fix those three and blowouts nearly vanish.
Temperature is the one people underestimate. Warm fat smears into a paste that will not slide, so pressure spikes and the casing lets go at its weakest seam. I chill the stuffer canister and the plates in the freezer for twenty minutes before I start, and I run the meat back to the fridge if the room warms up mid-batch. On a hand-crank stuffer you can feel the difference — cold farce moves like toothpaste; warm farce fights you and then splits. The whole diagnosis-and-fix tree, including horn size versus casing size and how to read the pressure, lives in why do my casings keep bursting: stuffing pressure and fixes.
How Do You Get Air Pockets Out of Salami?
Prick every air pocket the moment you spot it and press the meat toward the puncture so the trapped air escapes, then check again after the ferment when the casing tightens. Air pockets are not cosmetic: a void holds oxygen against the fat, which oxidises to a grey rancid ring, and it holds moisture that can grow the wrong mould from the inside out.
I keep a sterilised sausage pricker — a little cluster of pins — on the bench and go over every piece as it comes off the stuffer, rolling it firmly on the board to push air toward the surface. After the fermentation phase the casing shrinks onto the farce and reveals pockets you missed, so I prick again before the piece goes to the drying chamber. The technique for pressing versus pricking, and how to prevent the pockets at the stuffer in the first place, is in air pockets in salami: how to prick, press, and prevent them. If you are still getting big voids, the root cause is usually upstream at the stuffer, which loops back to stuffing pressure.
Which Casing Should You Use for Big Dry-Cured Salami?
For a large, slow salami the real choice is beef bung versus beef middle. Beef middle runs 45 to 65 mm and gives you a classic sopressata size that dries in two to three months; beef bung is 90 mm and up, holds a lot of farce, and rewards patience with a long, even cure — but it needs a longer soak, careful air removal, and a net, because a piece that heavy will sag and case-harden if it dries unevenly.
Diameter is destiny in a chamber. The wider the casing, the slower the core dries, and the more the surface wants to race ahead and harden into a shell that traps moisture inside — the classic case-hardening failure that kills more of my early pieces than mould ever did. Big casings demand a tighter humidity envelope (I hold roughly 80% RH for the fat pieces) and honest airflow management. The full comparison, including how each behaves through the weight-loss curve, is in beef bung vs beef middle: choosing a casing for big salami.
Why Won’t My Collagen Casing Grow White Mold?
Collagen casings resist white mould because their surface is smooth, processed, and often treated in a way that gives Penicillium nalgiovense nothing to grip. Natural casings are a porous protein membrane the mould can root into; extruded collagen is a uniform film that frequently stays bald no matter how well you spray it. That is not a defect in your culture — it is the substrate.
If you are set on a mould-ripened look with collagen, you can improve your odds — the right collagen type, surface moisture, and spray technique all move the needle — but manage your expectations, because some collagen simply will not colonise evenly. When a customer of the hobby-forum kind tells me their collagen salami “won’t take the culture,” the culture is usually fine and the casing is the problem. The why, and the practical workarounds, are in collagen casing won’t take mold: why and what to do. If you want reliable white mould, go back to natural casing — which starts with soaking and flushing it properly.
How Do You Tie and Net Salami for Even Drying?
Tie a butcher’s loop at the closed end for hanging, then either truss the piece with curing twine at regular intervals or pull elastic netting over it — the goal is to hold shape so the salami dries as a cylinder, not a lopsided teardrop. Uneven support means uneven airflow, and uneven airflow means one side case-hardens while the other stays wet.
For hog-cased pieces I usually tie by hand with cotton curing twine, a loop every few centimetres, because it is cheap and it lets me hang the piece from a dowel with a clean butcher’s knot. For anything in beef bung or beef middle I reach for elastic netting — it distributes the weight, keeps the fat pieces from sagging, and gives the white mould a lovely diamond pattern to grow through. The knots, the netting technique, and how spacing affects the drying, are in how to tie and net salami for even drying. Even support is what lets a big beef-bung salami dry without a hard shell.
How Do You Store Leftover Salted Casings?
Repack unused natural casings in plenty of non-iodised salt, seal them airtight, and keep them in the fridge — stored this way they hold for a year or more. The salt draws water activity down so low that spoilage bacteria cannot function; the enemy is not time but drying out and cross-contamination from a sloppy repack.
I keep my opened hanks coiled in a lidded container, buried in coarse salt, dated with tape on the lid. Never store them wet from a soak — if you prepped more than you stuffed, salt them down again heavily and they will keep. Iodised salt is a mistake here just as it is in the cure, because iodine is antimicrobial in a way that fights the natural casing’s chemistry; use plain salt. The full storage method, including freezing options and how to tell a casing has gone off, is in how to store leftover salted casings for months.
What Casing Mistakes Should You Avoid?
The mistakes cluster around impatience. The four I see most — and have made myself — are under-soaking, stuffing warm, skipping the prick, and tying loose. Each one shows up not at the bench but weeks later in the chamber, which is exactly why beginners never connect the cause to the effect.
The one that cost me a whole batch of sopressata early on: I stuffed on a warm summer afternoon with the farce sitting out, got smearing and blowouts, patched them, and hung the survivors without pricking hard enough. Six weeks later half of them had grey oxidised cores from trapped air, and two had case-hardened because the netting was uneven. Nothing in the chamber was wrong — temperature and humidity logged clean the whole time on my SensorPush HT.W. The defects were all built in during that hot half-hour at the stuffer. Now I treat casing prep and stuffing as the most important half-hour of the whole three-month project, because it is.
Curing is a hurdle system: salt, nitrite from cure #2, a fast pH drop below 5.3 from a starter culture, then a long slow slide in water activity as the piece loses 30 to 40% of its weight. Casing handling is the stage that decides whether those hurdles get a clean, evenly drying cylinder to work on — or a lopsided, air-pocketed piece that fights you the whole way. The same discipline that a fermenter brings to pH and water activity, a chamber builder brings to the twenty minutes at the stuffer.
How Does Casing Diameter Change Drying Time and Safety?
Diameter drives everything downstream because drying is diffusion: water has to travel from the core to the surface, and a fat piece has a longer journey. A 35 mm hog salami reaches 35% weight loss in four to six weeks; a 100 mm beef-bung salami can need three to five months for the same loss. That is not just a scheduling detail — it is a safety curve, because the piece is only shelf stable once water activity has fallen far enough.
The way I think about it, borrowed from how a fermenter reads a crock: a fermented salami is safe through a stack of hurdles, not one magic step. Salt at roughly 2.5 to 3% of the meat weight, nitrite and nitrate delivered by cure #2 at the standard 2.5 g per kilo, a starter culture that drops pH below 5.3 in the first days, and then the long slide in water activity as the piece sheds 30 to 40% of its green weight. A wide casing simply means the water-activity hurdle takes longer to clear, and it means the surface is more likely to race ahead of the core. That surface-races-ahead failure is case-hardening, and in a wide casing it is the thing most likely to ruin your work. I hold the fat pieces at the humid end of my envelope — about 80% RH against roughly 75% for thin salami — precisely to slow the surface down and let the core keep pace.
This is also why I log the green weight of every single piece before it ever goes on the dowel. The scale, not the calendar, tells me when a salami is done. A 700 g green sopressata is finished at roughly 420 to 490 g. Guessing by feel or by date is how people either eat a piece that is still wet in the middle or over-dry a good salami into a brick. The casing you chose set the timeline; the weight log tells you where on that timeline you actually are.
What Gear Do You Need for Casing Prep and Stuffing?
You need less than the forums suggest, but the pieces you do need have to be right: a real piston stuffer, a grinder with plates you can chill, a bowl for soaking, a sausage pricker, curing twine, and netting for the big pieces. The dividing line between frustration and flow is the stuffer — a piston-style unit fills at a controllable, even pressure where a grinder-attachment stuffer smears warm fat and fights you.
Across the chambers I run, the tools that earn their shelf space for casing work are specific. I chill my grinder plates and the stuffer canister in the freezer for twenty minutes before a batch, because cold farce is the single biggest defence against both smearing and blowouts. I keep a multi-pin pricker sterilised in the same drawer as my curing-grade cotton twine and my roll of elastic netting. And I do not stuff without my instant-read thermometer on the bench, because the moment the farce climbs past 4 °C the fat starts to smear and it is time to go back to the fridge. That thermometer honestly gets used more than my kitchen scale, and the scale gets used on every piece.
One tool people skip and regret: a proper horn that matches the casing. A horn too fat for the casing stretches it thin and invites splits; a horn too thin lets the casing bunch and trap air. Match the horn to the casing diameter, and half your stuffing troubles disappear before you start. The rest of the prevention lives in the deep dives on stuffing pressure and air-pocket prevention.
How Do You Prep Beef Bung and Middle Differently from Hog?
Beef casings are thicker and tougher than hog, so they take a longer soak — often an hour or more — and they reward a careful inspection for seams and weak patches before you commit a big, expensive load of farce to them. A blowout in a 35 mm hog salami costs you one link; a blowout in a beef bung packed with two kilos of farce is a genuinely bad afternoon.
The last big sopressata run I did, I soaked the beef middles a full ninety minutes in lukewarm water changed twice, then ran the flush slowly and turned each length over in the light looking for thin spots. Two of six had a papery patch near one end; I cut back to good casing rather than gamble. That five-minute inspection is the cheapest insurance in the whole process. Beef casings also hold their shape less on their own than a snug hog casing, which is exactly why the big ones want netting — the mesh is what keeps a heavy piece a cylinder instead of a sagging teardrop while it hangs. The full breakdown of when to reach for each is in beef bung vs beef middle, and the netting technique itself is in how to tie and net salami.
What Is the Full Casing Prep Workflow, Start to Finish?
Put together, the workflow is a short, ordered chain, and every link matters: choose the casing, soak and flush it, keep the farce cold, stuff at even pressure, prick out the air, tie or net for shape, and repack whatever you did not use. Skip a step and the defect surfaces weeks later in the chamber, far from where you can connect cause to effect.
Here is the order I follow on every batch. First, pick the casing to match the diameter and drying time I want — that decision drives the grind, the cure calculation, and the schedule. Second, rinse the salt, soak in lukewarm water 30 to 60 minutes (longer for beef), and flush the lumen until it runs clear, marking and cutting any pinhole. Third, chill everything and keep the farce under 4 °C. Fourth, stuff slowly at even pressure with a matched horn. Fifth, prick every air pocket, roll the piece to press the air out, and prick again after the ferment tightens the casing. Sixth, tie a butcher’s loop and truss or net for even airflow. Seventh, repack leftover casing in plain salt and refrigerate. That chain is the whole of this guide, and each link has its own field manual in the articles above.
As an Amazon Associate I earn from qualifying purchases. If you are stocking up on natural hog casings or a length of elastic salami netting, buy from a supplier who ships them salt-packed and dated.
For the food-safety fundamentals behind every number on this page, the USDA Food Safety and Inspection Service and the National Center for Home Food Preservation are the references I check my practice against. And because the pH drop that secures a salami is the same lactic-acid chemistry that ferments a jar of sauerkraut, the crossover reading at FermentFoundry is worth your time if you want to understand what your starter culture is actually doing.
Do I need to soak collagen casings like natural ones?
Most collagen casings do not need soaking and are ready to load straight onto the horn, which is one of their conveniences. Natural casings, shipped packed in salt, always need a rinse, a 30 to 60 minute lukewarm soak, and a flush of the lumen before stuffing. Always check the packet, because a few collagen types ask for a brief dampening.
How much natural casing do I need per kilo of meat?
As a rough rule, one hank of hog casing (around 90 metres) stuffs roughly 45 to 55 kilos of sausage, so for a typical 2 to 3 kilo home batch a couple of metres is plenty. Always prep more than you calculate, because you will lose sections to pinholes and weak spots found during the flush.
Why does my salami get a grey ring under the casing?
A grey ring is oxidised fat, almost always caused by an air pocket that trapped oxygen against the meat. Prick every pocket at the stuffer and again after fermentation when the casing tightens, and press the farce firmly so no voids remain. It is a stuffing defect, not a chamber problem.
Can I reuse casings I soaked but did not stuff?
Yes, if you repack them properly. Do not leave them wet. Drain them, bury them heavily in plain non-iodised salt, seal airtight, and refrigerate, and they will keep for months. Never use iodised salt, because iodine works against the casing chemistry the same way it inhibits a ferment.
What is the safest way to make sure my salami is dry enough?
Weight loss is the honest signal. Log the green weight of every piece and consider whole-muscle and fermented salami finished at roughly 30 to 40 percent weight loss, which corresponds to a water activity low enough for shelf stability. Combined with a fast pH drop below 5.3 from a starter culture and cure #2, that weight-loss endpoint is your safety anchor.
Further Reading
- How to Soak and Flush Natural Hog Casings the Right Way
- Why Do My Casings Keep Bursting? Stuffing Pressure and Fixes
- Air Pockets in Salami: How to Prick, Press, and Prevent Them
- Beef Bung vs Beef Middle: Choosing a Casing for Big Salami
- Collagen Casing Won’t Take Mold: Why and What to Do
- How to Tie and Net Salami for Even Drying
- How to Store Leftover Salted Casings for Months