Air Pockets in Salami: How to Prick, Press, and Prevent Them
July 18, 2026

Air pockets in salami come from air folded into the farce during mixing and stuffing, and the fix is a two-part habit: prick and press every pocket out at the stuffer, then prick again after fermentation when the casing tightens. Air pockets are not cosmetic. A trapped void holds oxygen against the fat, which oxidises to a grey rancid ring, and it holds moisture where the wrong mould can grow from the inside.
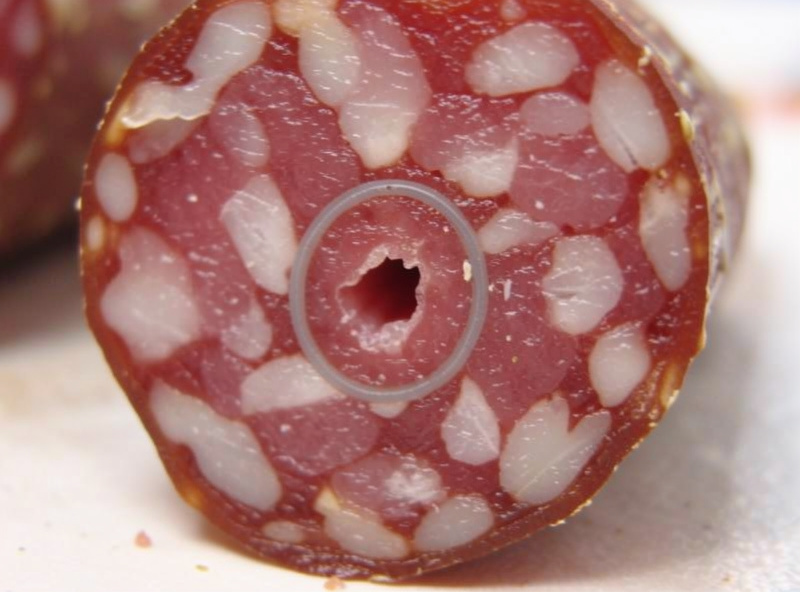
Of all the stuffing defects, this is the sneakiest, because you cannot see it until you slice the finished salami three months later and find a hollow with a grey halo around it. By then it is far too late to fix and impossible to un-learn cheaply. I have cut into pieces I was proud of and found air pockets I could have pricked out in ten seconds at the bench. So let me give you the whole prick-press-prevent workflow, the way I run it now on every piece.
This is one of the highest-value skills in the whole casing preparation and stuffing workflow, because it is invisible until it is permanent. Get it into your hands as a habit and you eliminate a defect most home charcutiers never even diagnose correctly.
What Causes Air Pockets in Salami?
Air pockets have two sources: air whipped into the farce during mixing, and air trapped between the meat and the casing during stuffing. Over-mixing a cold farce folds air in like a batter; a loose or bunched casing on the horn traps pockets as the meat arrives; and a soft, under-packed fill leaves voids that the casing cannot squeeze out on its own. All three are avoidable at the bench.
The mixing one surprises people. You want a good primary bind — the tacky, sticky protein extraction that holds a salami together — but you get that from salt and gentle, thorough mixing, not from whipping air through the meat. When I mix, I work the farce firmly and deliberately until it grabs the side of the bowl and my hand, then stop. Beyond that point I am just folding in air I will have to prick back out. The bind matters for texture too, which is why a broken or airy farce shows up in the same failure family as the greasy, unstable emulsions I cover in how to build a meat emulsion that doesn’t break.
Why Are Air Pockets a Problem?
Air pockets cause two real failures: oxidation and unwanted mould. The oxygen trapped in a void reacts with the fat and turns it rancid, leaving the tell-tale grey ring you see around a hollow when you slice. And the void holds moisture and air together — a small internal pocket where mould or spoilage bacteria can grow, shielded from the surface treatment and the drying that keep the rest of the piece safe.
That grey ring is the single most common “what went wrong with my salami” photo I get shown, and the answer is almost always an air pocket. It is not a chamber problem, not a humidity problem, not a culture problem — the temperature and humidity can log perfectly clean the whole cure and you will still get the ring if the air was trapped at the stuffer. Understanding that the defect is built in at the bench, weeks before it shows, is the whole mental shift. The pocket also disrupts even drying, creating a soft wet spot in an otherwise firming piece, which is its own risk on a long cure.
How Do You Prick Air Pockets Out?
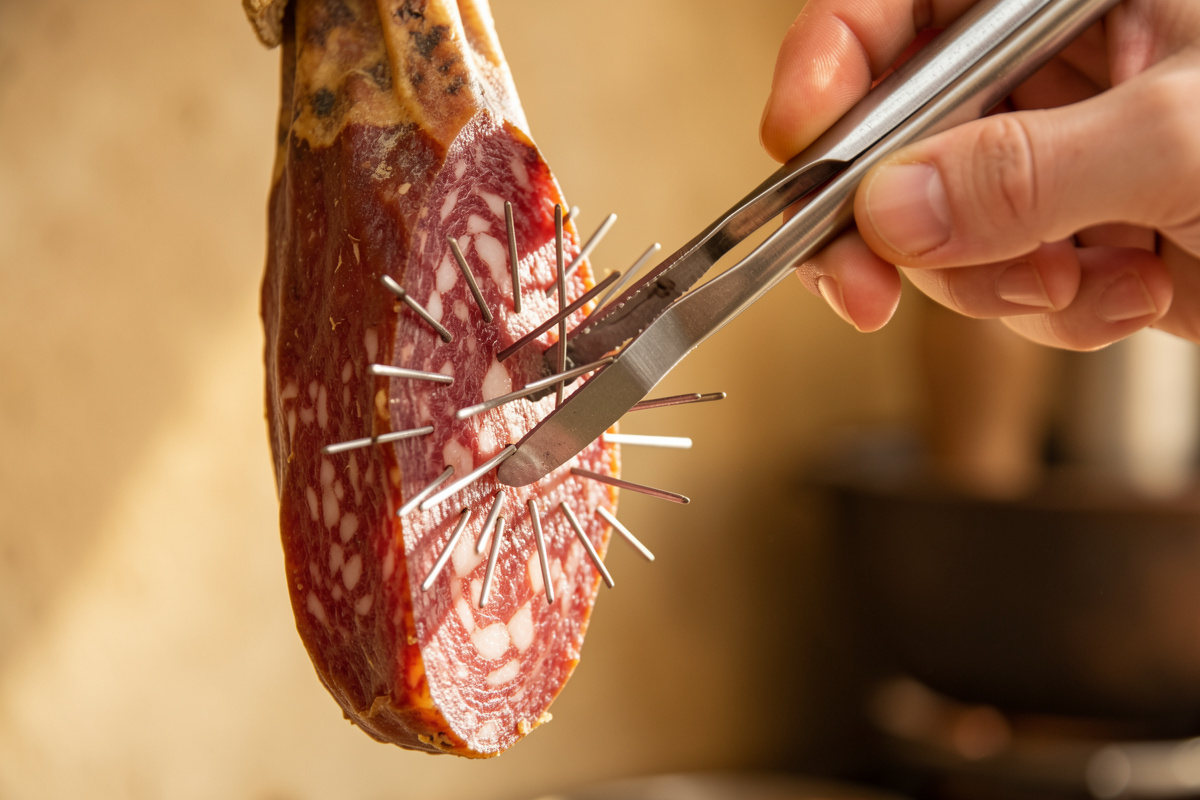
Prick each air pocket with a clean sausage pricker — a small cluster of fine pins — pushing the pins through the casing right at the void so the trapped air escapes. Work over the whole piece as it comes off the stuffer, holding it up to the light so pockets show as raised or shiny bumps, and prick every one you find. A single pin works, but a multi-pin pricker is faster and gentler on the casing.
I keep my pricker sterilised — a quick dip in boiling water or alcohol — because I am putting holes through the casing into the meat, and I do not want to introduce anything at the same time. The holes themselves close up and heal over as the casing dries and the surface mould takes hold, so they do not become drying faults. What matters is that you actually find the pockets, and that means good light and a methodical pass over every square centimetre, not a quick jab at the obvious ones. Rushing this is how you leave the one pocket that becomes the grey ring.
How Do You Press Air Out at the Stuffer?
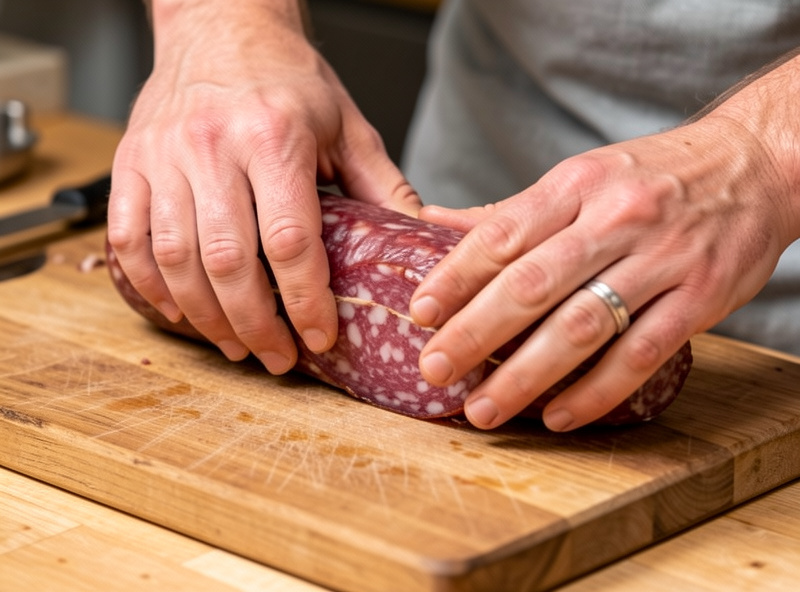
Pricking releases the air; pressing pushes it to where you can release it. After stuffing, roll the salami firmly on a clean board with the flat of your hands, working from the middle toward the ends, so trapped air migrates toward the surface and toward any prick holes. You will often feel a soft spot move and firm up as the air escapes — that tactile feedback is exactly what you are working for.
The sound and feel of this step is distinctive: a well-packed salami rolls firm and quiet, while one with trapped air gives a faint squelch and a soft give under your palm. I roll, prick where I feel give, then roll again, until the whole piece is uniformly firm along its length. For a long piece I work it in sections. This is also the moment to check my stuffing was tight enough in the first place — a soft, under-packed fill has voids no amount of pricking fully cures, which loops straight back to stuffing pressure and the fixes in why do my casings keep bursting, since the same firm-but-not-drum-tight fill that avoids blowouts also avoids air pockets.
How Do You Prevent Air Pockets in the First Place?
Prevention beats pricking. Mix the farce to a good tacky bind without over-whipping, keep it cold so it packs densely, load the casing snug on the horn with no bunching, push a little farce through to expel the air before you tie off the starting end, and stuff at a firm, even pressure so the meat fills every corner. Do those five things and you will have very few pockets left to prick.
The starting-end trick is the one people skip: before you tie off the closed end of the casing, let a little farce come through and push the air ahead of it out of the open tail, then tie. Tie the end first with air already trapped inside and you have built a pocket at the very start of the piece. I also keep the farce genuinely cold — near freezing — because cold, cohesive meat packs without voids where warm, smeary meat traps air as it folds. Cold meat solves half a dozen problems at once, which is why it is the first thing I fix whenever anything goes wrong at the stuffer.
Should You Prick Again After Fermentation?
Yes — prick again after the fermentation phase. As the salami ferments and begins to dry, the casing shrinks tight onto the farce and reveals pockets that were invisible when the casing was full and taut. A second pricking pass, once the piece has fermented and the casing has drawn in, catches the voids you missed and is your last good chance before the piece goes to the long dry.
In my setup the timing is roughly a day or two after stuffing, once the ferment has done its work and the pH has dropped — the same fast acid drop below 5.3 from a starter culture that secures the salami also firms the farce and tightens the casing, making pockets show. I go over every piece again under good light before it moves from the warm, humid fermentation spot to the cooler drying chamber. Miss this second pass and a pocket that was hidden at stuffing will still be there, and still oxidising, three months on. The relationship between the ferment, the culture, and the sugar that feeds it is worth understanding from dextrose vs sugar in cured sausage, because a clean, fast ferment is part of what makes the second pricking effective.
What Tools Help Remove Air Pockets?
The core tools are simple: a multi-pin sausage pricker, a clean board to roll on, and good light. A cluster pricker beats a single pin because it releases a pocket in one push and makes fewer, gentler holes than jabbing repeatedly; some people use a sterilised needle or a specialised “salami pricker” roller with multiple points for long pieces.
I have tried the fancier roller-style prickers and, for the volume I do, a good handheld multi-pin unit and my own hands doing the rolling is all I actually reach for. The light matters as much as the tool — I do this pass near a window or under a bright lamp precisely so pockets throw a highlight or a shadow I can catch. Whatever you use, the discipline is the same: methodical coverage, sterile pins, prick-and-press, then prick again after the ferment. Tools help; the habit is what actually removes the pockets.
What Air Pocket Mistakes Should You Avoid?
The mistakes are all shortcuts: over-mixing warm farce, tying off the end with air already inside, under-packing the fill, pricking only the obvious pockets, and skipping the second pass after fermentation. Every one leaves a void that surfaces months later as a grey ring in an otherwise good salami.
My own worst run of this was a batch of sopressata early on. I mixed the farce too enthusiastically, stuffed it a touch soft because I was worried about blowouts, and gave the pieces only a quick prick before hanging. Nothing in the chamber went wrong — the SensorPush logged a clean 13 °C and 80% RH the whole time. But when I sliced them, half had hollow centres ringed in grey oxidised fat. It was a stuffing defect from start to finish, and it taught me to treat pricking and pressing as seriously as the cure itself. Now every piece gets the full prick-press-prevent treatment, twice, and the grey rings are gone. For the safe-handling fundamentals behind all of this, I check my practice against the USDA Food Safety and Inspection Service and the National Center for Home Food Preservation.
What causes air pockets in salami?
Air pockets come from two sources: air whipped into the farce during over-mixing, and air trapped between the meat and the casing during stuffing. A loose casing on the horn, a soft under-packed fill, and tying off the end with air inside all create voids. Cold, well-bound, firmly packed farce prevents most of them.
Why is an air pocket in salami a problem?
A trapped air pocket holds oxygen against the fat, which oxidises to a grey rancid ring, and it holds moisture where unwanted mould or bacteria can grow shielded from the surface. It also disrupts even drying, leaving a soft wet spot. It is a stuffing defect, not a chamber problem.
How do you get air pockets out of salami?
Prick each pocket with a clean multi-pin sausage pricker so the trapped air escapes, then roll and press the piece firmly on a board to push remaining air toward the surface and the prick holes. Do this over the whole piece under good light at the stuffer, then prick again after fermentation when the casing tightens.
Should I prick salami again after fermenting?
Yes. As the salami ferments and starts to dry, the casing shrinks onto the farce and reveals pockets that were hidden when it was full. A second pricking pass a day or two after stuffing, before the piece goes to the drying chamber, catches those voids. It is your last good chance to remove them.
Do the prick holes cause drying problems?
No. The small holes from a fine pricker close up and heal over as the casing dries and the surface mould develops, so they do not become drying faults. Keep the pricker sterilised, since you are putting holes through the casing into the meat, but the holes themselves are not a problem.
Related Reading
- Preparing Sausage Casings: A Complete Guide
- Why Do My Casings Keep Bursting? Stuffing Pressure and Fixes
- How to Soak and Flush Natural Hog Casings the Right Way
- How to Build a Meat Emulsion That Doesn’t Break