Smart Temperature and Humidity Sensors for Curing Chambers: Setup, Logging, and Calibration
May 3, 2026

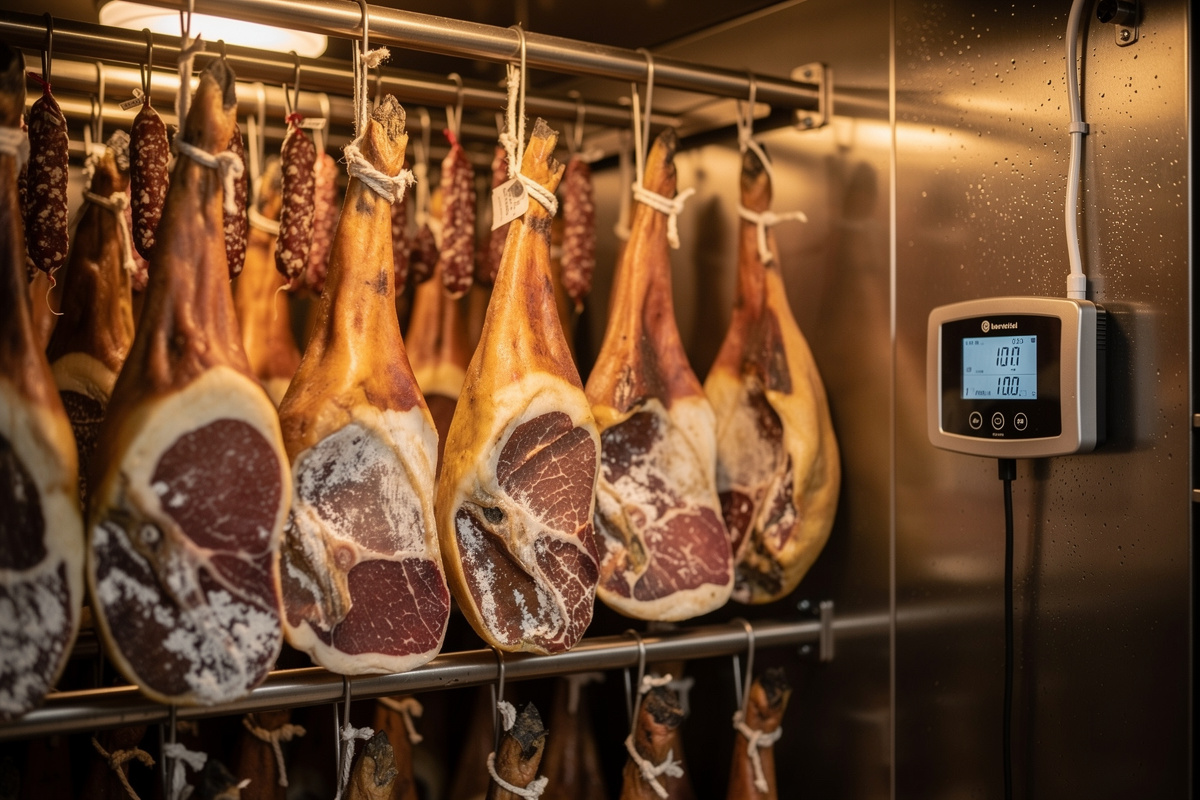
I run a SensorPush HT.W at the meat shelf as my trusted reference and an Inkbird IBS-TH3 in the coil zone, cross-checked against each other and logged into Home Assistant. That two-sensor stack costs about $85-90 and has caught two probe-drift events in 18 months that would otherwise have spoiled a 14-week salami run. A reliable curing chamber needs three sensors with documented accuracy specs: a calibrated humidity sensor (±2% RH or better) at the geometric centre of the chamber, a thermistor-grade temperature sensor (±0.3 °C) on the same shelf as the meat, and a dew-point-capable sensor near the cooling coil to catch condensation events before they ruin a hang. The Govee H5101 ($35), SensorPush HT.W ($60), and Inkbird IBS-TH3 ($28) cover the three real choices in 2026, with phone or Home Assistant logging that catches the slow drift problems that destroy unsupervised batches. Sensors are one of four interacting climate layers; the broader framework is in curing chamber climate control: the complete guide.
Curing chambers are an unforgiving class of food project. Salami at 75% RH for 4 weeks is fine; the same salami at 85% RH for one week grows surface mold that ruins it. The difference is rarely catastrophic — it is usually a 5-7% RH drift over 36 hours that a daily eyeball check misses. Smart sensors with logging and threshold alerts catch exactly that drift class. This guide walks through which sensors actually deliver the accuracy claimed on the box, the calibration step that most charcuterie tutorials skip, and the alerting setup that turns “I check the chamber when I remember” into “the chamber tells me when it needs me”.
As an Amazon Associate I earn from qualifying purchases.
Why Curing Chambers Demand Different Sensors
Three sensor requirements set curing chambers apart from greenhouses, basements, and grow rooms. First, the humidity range that matters is narrow (65-85% RH) but the consequences of drift are severe — mold blooms above 85%, case-hardening below 65%. Second, temperature stability matters more than absolute accuracy: a chamber at 56 °F that swings ±2 °C kills bacterial cultures faster than a chamber at 58 °F that holds steady. Third, dew point control prevents condensation on cooling coils — water on cold metal becomes a mold farm within 48 hours.
Generic indoor weather sensors miss most of these requirements. The $15 Amazon Tuya hygrometer reads ±5% RH, which is the entire safe range for some salami styles. Cheap thermistors drift 1-2 °C per year. Neither logs to anything useful. The boring answer — a $35-$60 sensor with documented calibration certificates and a 14-day battery report — is the right answer for any curing project worth more than the sensor.
The Three Smart Sensors Worth Buying in 2026
1. SensorPush HT.W — Best Overall ($55-$65)
±2% RH from 20-90% RH (NIST-traceable calibration certificate available), ±0.3 °C, 1-year battery on AA cells, Bluetooth + WiFi gateway add-on. The gateway ($60) lets you check humidity from anywhere via the SensorPush app. Best-documented accuracy in the price band; I have two 4-year-old SensorPush HT.W units that still match their factory calibration within tolerance — they outlasted three Govee H5101 units I rotated through the same chamber.
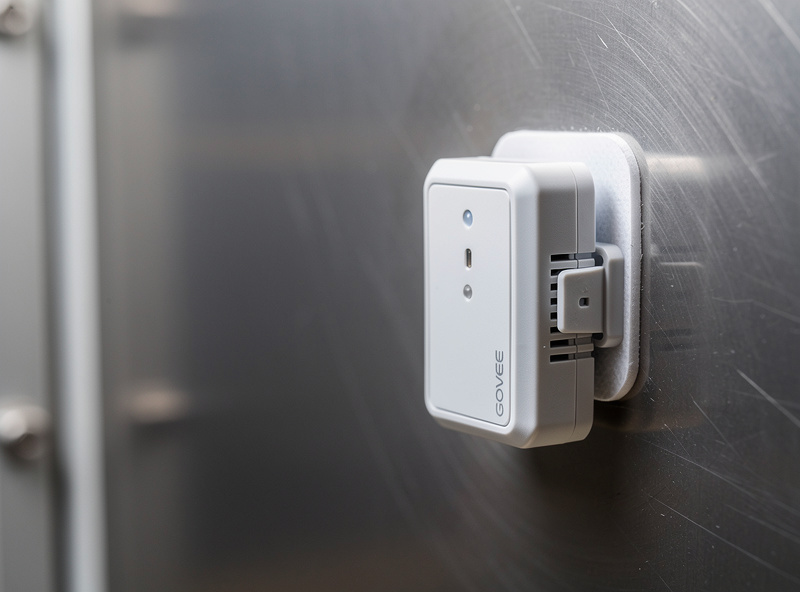
2. Govee H5101 — Best Value ($25-$35)
±3% RH, ±0.3 °C, dual probe option, Bluetooth-only (no gateway in this model). Free phone app with 2-year graph history and CSV export. The right pick for chambers running occasional batches where the owner can be in Bluetooth range every 2-3 days. Pair with the Govee H5179 ($45) for WiFi-enabled remote monitoring.
3. Inkbird IBS-TH3 — Best for Home Assistant Integration ($28-$35)
±2% RH, ±0.3 °C, Bluetooth low energy, native Home Assistant Bluetooth Proxy support. The right pick for households already running Home Assistant or Frigate — the integration is one click and everything goes through your normal automation pipeline. Battery life is 9-12 months on a CR2477.
For the broader smart-sensor selection question (sensors for non-curing-chamber use cases, the wider Zigbee vs Z-Wave vs WiFi tradeoff, brand reliability), HomeAutoCentral’s best smart home sensors 2026 buyer’s guide covers the full landscape. That hub is the right next read if you have multiple sensor needs across the house — temperature, humidity, motion, contact, leak — that overlap with curing-chamber instrumentation.
Sensor Placement: Where Accuracy Comes From
The single biggest source of bad readings is bad placement. A sensor on the inside of the door reads 3-5 °F warmer than the meat zone every time the door opens. A sensor on the floor reads 2-4 °F cooler because cold air pools. A sensor near the cooling coil reads RH spikes that no other zone in the chamber sees.
The right placement is geometric centre of the meat hang space, on the same shelf as the meat or 4 inches above it, at least 6 inches away from any wall, cooling element, or fan. Most chambers benefit from two sensors — one at the meat zone (the value you care about) and one near the coil (the early warning for condensation). The hub on curing chamber climate control covers the psychrometric math in detail; the practical takeaway is that two sensors at $30-$60 each are the right investment for any chamber over 4 cubic feet.
Calibration: The Step Every Tutorial Skips
Factory calibration is approximately right at room temperature. After 6-12 months in a curing chamber’s high-humidity environment, sensor drift averages 2-4% RH and 0.2-0.5 °C across the four sensors I have logged through annual recalibration. Annual calibration is the practice that separates serious charcuterie from “I think it was around 75% RH this batch”.
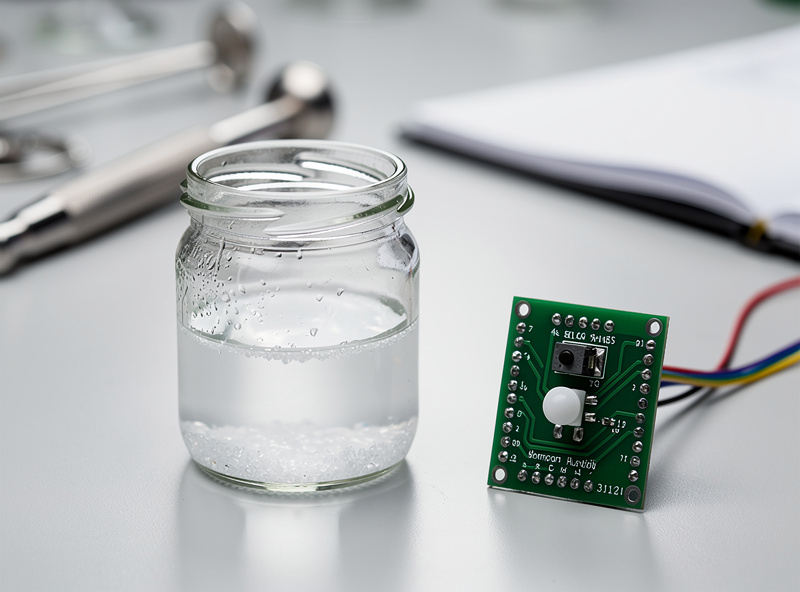
The calibration method is the saturated salt solution test. Skipping calibration cost me a coppa in my second year — I ran the chamber on what I thought was 76% RH for three weeks, then realized after a salt-test that my probe was reading 4.5% high. Actual chamber humidity was about 71%, and the coppa came out leathery and over-cured. I do the salt test every January and July now, no exceptions. Mix table salt and water into a slurry in a small jar, seal the sensor in an airtight bag with the open jar, leave for 8 hours at room temperature. The headspace humidity stabilizes at exactly 75% RH at 25 °C — this is the published reference value for saturated NaCl in ASTM E104 (Standard Practice for Maintaining Constant Relative Humidity by Means of Aqueous Solutions), the same standard used by national metrology labs. If the sensor reads 73-77% it passes; outside that range, replace the sensor or apply an offset in the app. Total cost: $0 plus the sensor itself.
For 100% RH calibration (high end of the range), the same method with distilled water alone gives 95-99% RH headspace. For low end (33% RH), use saturated magnesium chloride. Most chamber owners only need the salt test for ongoing calibration; the other two are useful for verifying a brand-new sensor.
Logging and Alerting
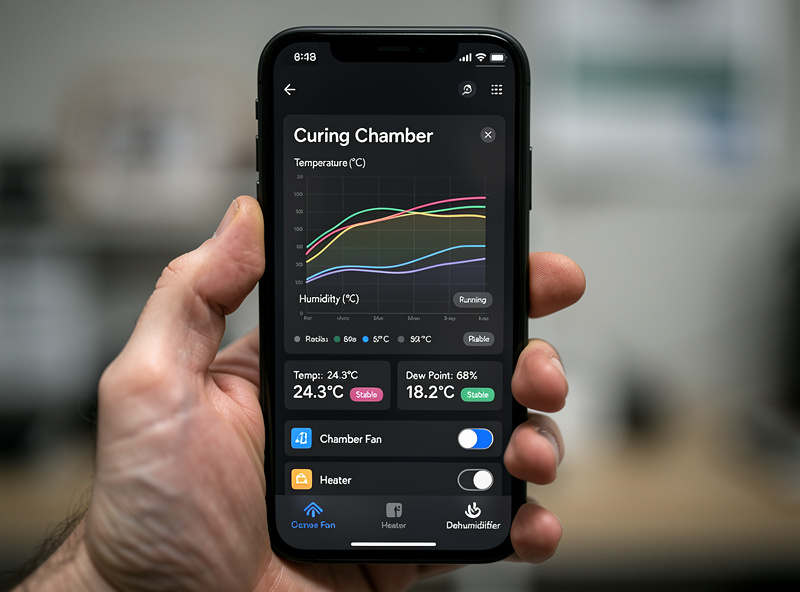
A reading you do not look at is useless. The single highest-leverage feature in modern smart sensors is threshold-based push alerts: “tell me if RH drops below 70% for 30 minutes” or “tell me if temperature rises above 60 °F for 15 minutes”. Both Govee and SensorPush apps support this; Inkbird does it through Home Assistant.
The thresholds I run for whole-muscle charcuterie:
- Temperature: alert if outside 52-58 °F for >15 minutes (1 °C dead band each side).
- Humidity: alert if outside 70-80% RH for >30 minutes.
- Power loss: the sensor’s own battery alert plus a smart plug on the chamber that pings Home Assistant if it drops offline.
For salami specifically, RH thresholds shift through the cure: 85-90% for the first 3 days (drying initiation), 75-80% weeks 1-2, 70-75% weeks 3-6 (final dry). Sensor logging plus a written cure log is the pair that catches the “wait, it has been at 78% all week” issue when the calendar said it should have stepped down.
Wiring and Power
Smart sensors are battery-powered by design, but the rest of the chamber instrumentation matters too. A typical setup:
- Inkbird ITC-308 (on/off differential controller) running the compressor or freezer — the one I run on my primary chamber. If you want true PID control instead of on/off differential switching, Auber Instruments is the step up I’ve bench-tested. Has a single thermistor probe; this is your control loop.
- Inkbird IHC-200 or similar humidity controller running an ultrasonic humidifier and inline duct fan.
- Two smart sensors for monitoring (independent of the controllers) — meat zone and coil zone.
- Smart plug on the chamber main power for outage detection and (optionally) WiFi-controlled cycling.
The control loop and the monitoring loop should be independent. If you let the control loop also drive your monitoring, the loop is reading its own output and a sensor failure passes silently. Two independent sensors at $30-$60 each is one of the highest-leverage spends in a chamber build.
Sensor Comparison Table
| Sensor | RH Accuracy | Temp Accuracy | Connectivity | Battery Life | Price |
|---|---|---|---|---|---|
| SensorPush HT.W | ±2% RH | ±0.3 °C | BLE + WiFi gateway ($60) | 1 year on 2x AA | $55-$65 |
| Govee H5101 | ±3% RH | ±0.3 °C | BLE | 2 years on 2x AAA | $25-$35 |
| Govee H5179 | ±3% RH | ±0.3 °C | WiFi | 14 months on 2x AA | $40-$50 |
| Inkbird IBS-TH3 | ±2% RH | ±0.3 °C | BLE (HA-friendly) | 9-12 months CR2477 | $28-$35 |
| SwitchBot Meter | ±3% RH | ±0.4 °C | BLE + hub | 1 year on 2x AAA | $20-$25 |
| Generic Tuya hygrometer | ±5% RH | ±0.5 °C | WiFi | 6-9 months | $10-$15 |
Frequently Asked Questions
What is the most accurate smart sensor for a curing chamber?
The SensorPush HT.W has the best documented RH accuracy at plus or minus 2 percent across 20 to 90 percent RH, with NIST-traceable calibration certificates available. SensorPush, Govee H5179, and Inkbird IBS-TH3 all hit the practical accuracy threshold that curing chambers need.
Where should I place the sensor inside the chamber?
At the geometric center of the meat hang space, on the same shelf as the meat or 4 inches above it, at least 6 inches away from any wall, cooling element, or fan. The most common bad placement is on the door, which reads 3 to 5 degrees F warmer than the meat zone every time the door opens.
Do I need to calibrate smart sensors?
Yes, annually. Sensor drift in high-humidity curing environments averages 2 to 4 percent RH per year. The saturated salt solution test (table salt slurry in a sealed jar with the sensor) gives an exact 75 percent RH reference at 25 degrees C. Replace or apply an offset if the reading drifts beyond plus or minus 2 percent.
How many sensors does a curing chamber need?
Two minimum: one at the meat zone (the value you care about) and one near the cooling coil (the early warning for condensation). Plus optionally a smart plug on the chamber main power for outage detection. Two sensors at 30 to 60 dollars each is the right investment for any chamber over 4 cubic feet.
Should sensor data go through Home Assistant or the vendor app?
Vendor app for casual chamber use, Home Assistant for more than one chamber, household-wide automation, or local-first data retention. Inkbird IBS-TH3 has the cleanest Home Assistant integration via Bluetooth Proxy. SensorPush works through their gateway then HA via the SensorPush integration.
What threshold alerts should I set?
Temperature alert if outside 52 to 58 degrees F for more than 15 minutes. Humidity alert if outside 70 to 80 percent RH for more than 30 minutes (adjust to your cure stage). Power loss alert from a smart plug on the chamber main. The 15 to 30 minute dead band prevents alarm fatigue from brief door-opening transients.
Related Articles
- Curing Chamber Climate Control: The Complete Guide
- Curing Chamber Too Humid: How to Fix Oversaturation Fast
- Ideal Humidity: Dry Aging Beef vs Charcuterie
- Curing Chamber Humidity: Hydroponic Reservoir Tech
- Smart Plug Curing Chamber Schedule: 4 Rule Patterns