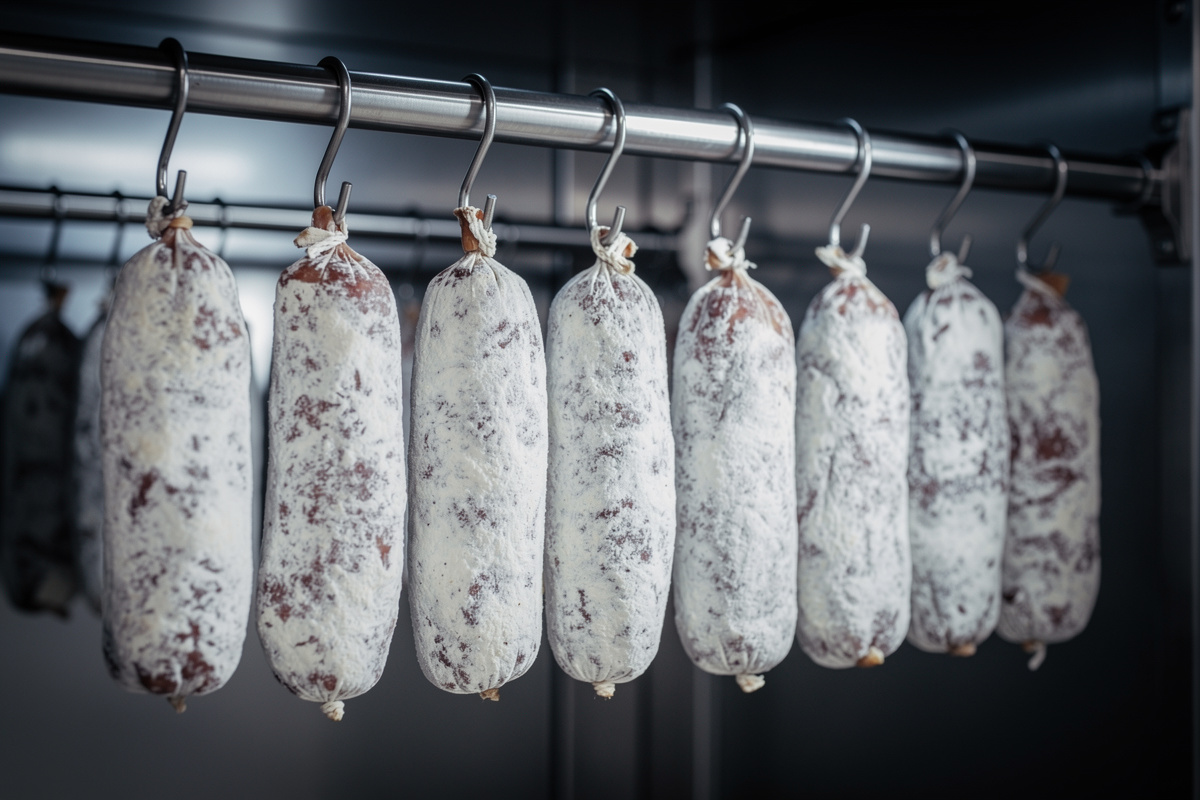

A salami drying rack is any food-safe frame that hangs your salami with air on every side, and the simplest reliable build is a stainless steel rod across the top of the chamber with stainless S-hooks. Hanging — not laying flat — is what gives even drying and stops the damp contact spots where bad mold takes hold. Use stainless or hardwood; never galvanized.
The rack is the least glamorous part of a curing chamber and one of the most important. Salami needs gentle airflow reaching all the way around each piece so moisture leaves evenly; a salami resting against a wall or another stick develops a wet flat spot that dries slowly, traps moisture, and grows the fuzzy black or green mold you do not want. Get the hanging geometry right and the chamber’s airflow does the rest.
This guide covers the food-safe materials, three rack designs that fit a converted-fridge chamber, the spacing and airflow that actually matter, and the hygiene details that keep a rack from becoming a contamination source. It pairs with the chamber build guide and the airflow and fan guide; this is the hanging hardware specifically.
Why Salami Must Hang With Air on All Sides
Salami dries by losing moisture from its entire surface to the surrounding air, so every part of the casing needs airflow. A hanging salami presents its whole surface to the chamber’s gentle air exchange and dries uniformly; one lying on a shelf seals where it touches, leaving a soft, damp underside while the top dries normally. That moisture differential is exactly what invites unwanted mold and uneven curing.
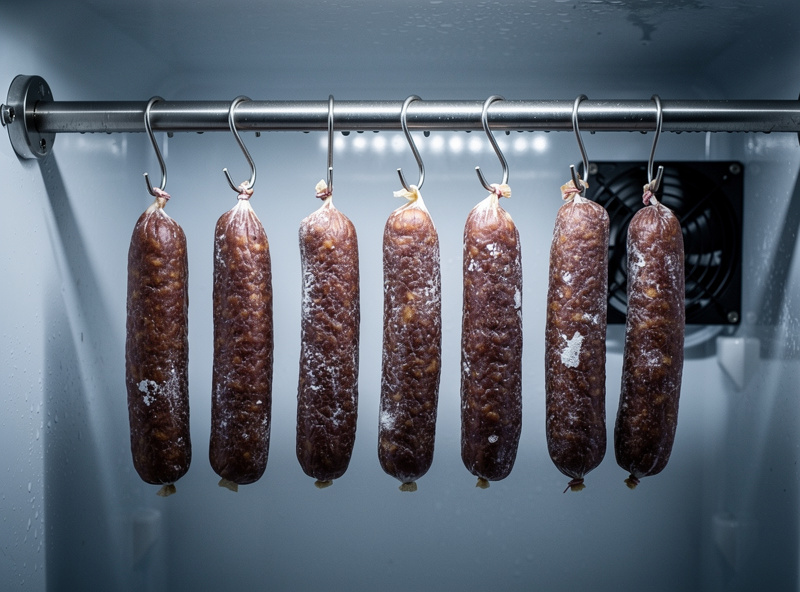
Spacing is part of the same principle. Salami should not touch each other or the chamber walls — pieces pressed together share a contact face that cannot breathe, and a salami against a cold wall can collect condensation. I leave a couple of centimetres of clear air between pieces and keep everything off the walls. The chamber’s fan, cycling on a short on/off interval to exchange air without blasting the meat, then moves humidity past every surface evenly. The rack’s only job is to hold the salami in that moving air without anything touching anything else.
Food-Safe Materials: What to Use and What to Avoid
Use stainless steel rod and S-hooks, food-grade hardwood dowel, and butcher’s twine or food-safe elastic netting. Avoid galvanized (zinc-coated) steel entirely — zinc is reactive and not something you want in contact with cured meat in a humid chamber, where it can corrode and contaminate. Also skip bare mild steel (it rusts) and reactive metals like copper or brass for anything touching the meat or twine.
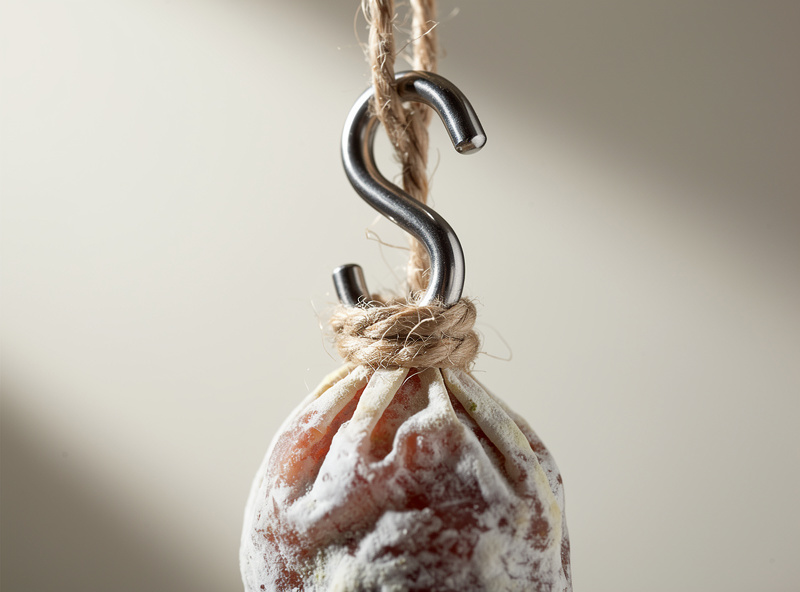
Stainless is the right default because it shrugs off the constant 75-80% humidity that would rust ordinary steel within a season, and it sanitises easily between batches. Hardwood dowel (oak, maple, beech) works well as a hanging bar and is traditional; just keep it unfinished or finished with a food-safe oil, and let it dry fully between uses so it does not harbour mold. For tying, curing-grade butcher’s twine knotted around the salami’s tied end and looped over the hook is the simplest method; elastic meat netting is a fast alternative that also gives the salami a nice shape and an easy loop to hang from.
Three Rack Designs for a Fridge Chamber
The right design depends on your chamber and how many salami you hang at once. All three keep the meat suspended in moving air; they differ in capacity and effort.
| Design | Build | Capacity | Best for |
|---|---|---|---|
| Rod & S-hooks | Stainless rod mounted across the top, S-hooks per piece | Low-medium | Most converted-fridge chambers |
| Stainless wire shelving | Repurposed wire shelf; hang from the top wires | Medium | Mixing hanging and shelf space |
| Dowel frame | Hardwood dowels in a removable frame | Medium-high | Dedicated chambers, batch curing |
| Tension rod | Spring tension rod wedged across the fridge | Low | No-drill renters, small batches |
For most people converting a fridge, the rod-and-hook design is the one I recommend first: a single stainless rod fixed across the top of the cabinet, with a stainless S-hook for each salami. It is cheap, removable for cleaning, and holds a useful number of pieces. A spring tension rod is the no-drill version for renters or anyone who does not want to put screws into the chamber. Wire shelving is handy when you want to mix hanging salami above with shelved whole-muscle pieces below, and a hardwood dowel frame scales up for dedicated chambers running bigger batches.
Building the rod-and-hook version takes ten minutes. Measure the internal width of the chamber, cut a stainless rod a touch longer so it spans wall to wall, and support it on two stainless brackets or simply rest it in notches on the existing shelf supports near the top — high enough that the longest salami you plan to hang clears the floor with room to spare. Slip the S-hooks over the rod, and you are done. The whole assembly lifts straight out for cleaning, which is the feature that matters most over a season of batches. If you would rather not drill the cabinet at all, a spring tension rod rated for the span wedges in with no hardware and holds a light batch perfectly well.
Airflow, Spacing, and a Drip Tray
Position the rack so the chamber’s fan moves air across the salami, not directly onto one piece. The goal is the same gentle, intermittent air exchange the whole chamber is tuned for — enough to carry moisture away, never a constant blast that dries the surface faster than the core (the cause of case-hardening). Hang heavier and lighter pieces so the airflow reaches all of them, and rotate positions if your chamber has a dead corner.
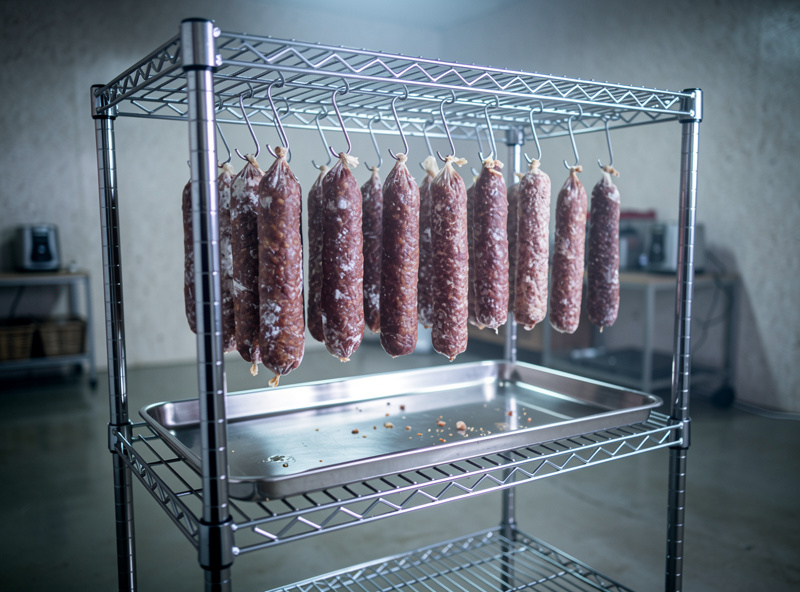
Put a removable tray under the rack to catch the occasional drip in the first days — fresh salami can weep slightly before it sets, and you do not want that pooling on a chamber floor where mold can establish. Keep the whole rig easy to lift out so you can sanitise it between batches; a rack that comes out in one piece gets cleaned, while a permanent built-in one tends to accumulate grime. After each batch I pull the rod, hooks, and tray, wash and sanitise them, and let them dry fully before the next load. The airflow and fan-cycling side of this is covered in depth on the airflow and fan guide, and the shelving materials that pair with a hanging rack on the chamber shelving guide.
Disclosure: CuringChamber is reader-supported. As an Amazon Associate I earn from qualifying purchases made through links in this article, at no extra cost to you. I only point to gear I actually use or would buy for my own chamber.
To build a rack, the food-safe parts that matter are a length of stainless steel round rod for the hanging bar, a pack of stainless steel S-hooks for the pieces, and curing-grade butcher’s twine (or elastic meat netting) for tying. If you want a ready-made frame, a stainless wire shelving unit repurposes neatly into a hanging-plus-shelf rack.
Frequently Asked Questions
What material should a salami drying rack be made of?
Use stainless steel rod and S-hooks, food-grade hardwood dowel, and butcher’s twine or food-safe netting. Avoid galvanized (zinc-coated) steel, bare mild steel, and reactive metals like copper, which can corrode or contaminate in the humid chamber.
Why can’t salami touch while drying?
Where two salami touch, the contact face cannot breathe, so moisture is trapped and that spot dries slowly and grows unwanted mold. Leave a couple of centimetres of clear air between pieces and keep them off the chamber walls so airflow reaches every surface.
Can I use a galvanized rack for curing meat?
No. Galvanized steel is zinc-coated, and zinc is reactive and unsuitable for contact with food in a humid curing environment where it can corrode. Use stainless steel or food-grade hardwood instead for anything touching the meat or twine.
How do I hang salami in a converted fridge?
Mount a stainless steel rod across the top of the cabinet and hang each salami from a stainless S-hook, tied with butcher’s twine around its end. A spring tension rod is the no-drill option for renters. Keep pieces spaced and off the walls.
Do I need a drip tray under the rack?
Yes, a removable one for the first few days. Fresh salami can weep slightly before it sets, and you do not want drips pooling on the chamber floor where mold can establish. A removable tray also makes cleaning and sanitising between batches easy.
How far apart should I space hanging salami?
Leave at least a couple of centimetres of clear air between pieces and keep them off the walls. The chamber’s gentle, intermittent fan airflow then carries moisture past every surface evenly. Rotate positions if your chamber has a dead corner.
Is wood okay for a salami hanging rack?
Yes, food-grade hardwood like oak, maple, or beech works well and is traditional. Keep it unfinished or treated with food-safe oil, and dry it fully between batches so it does not harbour mold. Stainless is the lower-maintenance default in a humid chamber.