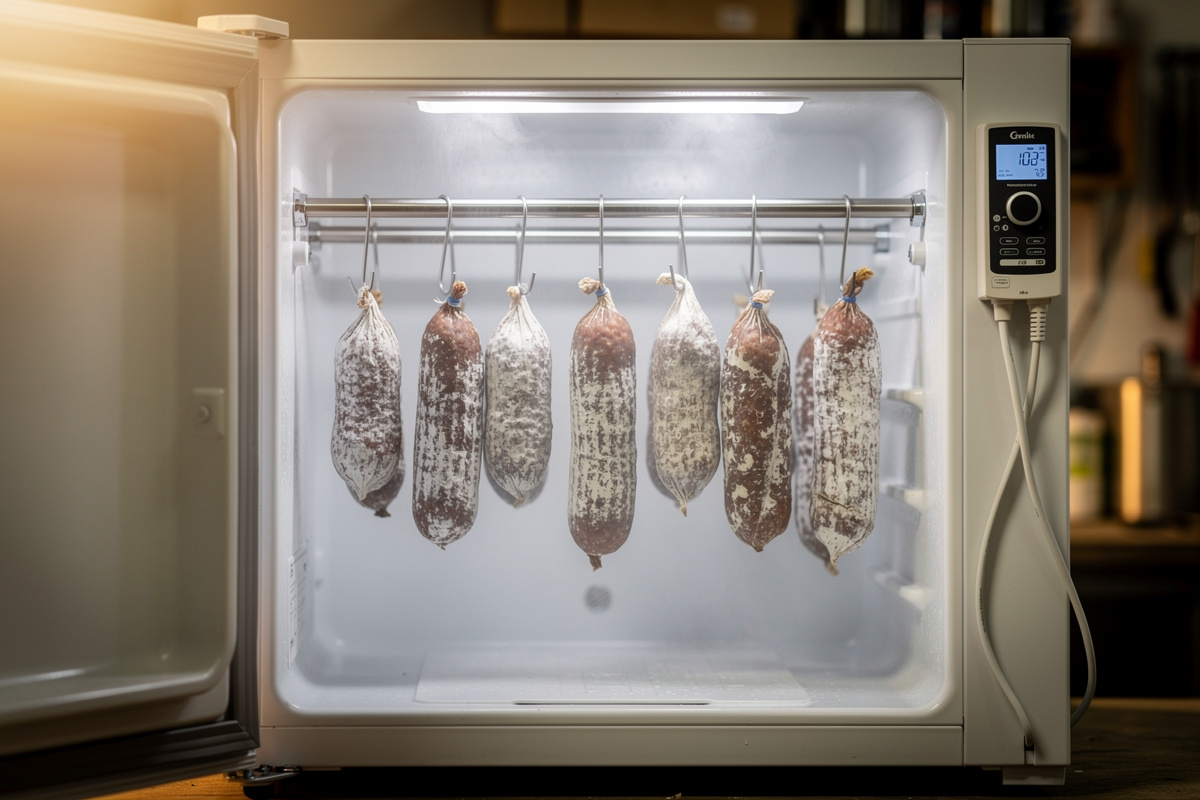
How to Convert a Fridge Into a Curing Chamber: Step-by-Step Guide
May 4, 2026

I converted a $35 Magic Chef mini fridge into my first curing chamber 18 months ago, and the entire build (controller wiring, humidifier, fan, hanging rod) took me about three hours including a 30-minute Marketplace pickup detour.
As an Amazon Associate I earn from qualifying purchases.
Convert a refrigerator into a curing chamber by adding an Inkbird ITC-308 dual-stage temperature controller, a small ultrasonic humidifier on the bottom shelf, a USB fan for air circulation, and stainless steel hanging rods through the upper section. A used mini-fridge from Craigslist for $50-150 plus $130-200 in modification parts produces a chamber that maintains 55°F at 70-80% relative humidity for under $250 total — that target sits right next to the drying-room range commercial processors use for semidry sausage, 12.9-15.7°C (55.2-60.3°F) at 65-75% RH. The broader system context (controllers, humidity, airflow, power) is in how to build a curing chamber: the complete guide.
The fridge-to-curing-chamber conversion is the most-built DIY project in home charcuterie because real curing chambers cost $1,500-3,000 retail and a converted fridge does the same job for under $250. The temperature control is the easy part — every fridge already cools. The humidity control is where 80% of beginners get stuck, and where this guide focuses most of the technical detail.
Choosing the Right Fridge for Conversion
Mini-fridges work for charcuterie volumes under 8-10 pounds; full-size fridges accommodate 20-40 pounds; chest freezers (yes — they convert too) handle 50+ pounds. Favor a frost-free (auto-defrost) model over an old static-cooling one — the defrost cycle keeps the evaporator coil from icing over, so the fridge runs the interior air drier and more predictably. A manual-defrost fridge has no internal fan and no active dehumidify behavior: condensation builds on the cold plate until it eventually melts and dumps humidity into the chamber all at once, which is a worse failure mode than anything a defrost cycle does.
Fridge selection criteria:
- Favor auto-defrost (frost-free) models: The defrost cycle keeps the coil from icing over, so the fridge runs interior air drier and more consistently — it’s why most published DIY chamber builds and most working curing chambers I’ve seen (mine included) started life as a frost-free fridge. A manual-defrost unit has no fan and no active dehumidify cycle; frost builds on the cold plate and dumps humidity into the chamber all at once when it finally melts.
- Mini-fridge (3-5 cubic feet): Best for first chambers. Holds 8-10 pounds of charcuterie. Used $50-100, new $150-250.
- Wine cooler / wine fridge: Premium option. Already runs at 50-60°F natively, requires less Inkbird intervention. Used $80-200.
- Full-size fridge (10-15 cubic feet): Holds 20-40 pounds. Favor a working frost-free model over a very old static-cooling unit. Used $50-200.
- Chest freezer converted to chamber: Best long-term capacity. Set to ambient via Inkbird; never enables freezer cycle. 50+ pounds capacity. Chest freezers are almost always static-cooling with no internal fan, so budget for both the circulation fan and the humidifier from day one.
- Check the internal fan works: Frost-free fridges circulate air with a small internal fan as part of the defrost cycle. On a used unit, confirm that fan still runs — a dead fan means no air movement even though the compressor still cools fine.
- Verify the door seals: Used fridges often have damaged door gaskets that prevent humidity retention. Test by closing on a dollar bill — if it pulls out without resistance, gaskets need replacement.
Most successful first conversions start with a 3-5 cubic foot mini-fridge from Craigslist for $50-100. The size limits the project to 3-5 pounds of charcuterie at a time, which matches what beginners can actually consume before quality degrades. Read about chamber size considerations in our companion curing chamber build cost piece.
Required Equipment and Costs
The full conversion costs $130-200 in modification parts plus the fridge purchase. Required items: Inkbird ITC-308 controller ($35-45), small ultrasonic humidifier ($25-40), USB fan with timer ($15-25), stainless steel hanging rods or hooks ($20-30), digital hygrometer for verification ($15-20), and silicone sealant ($8-12). Optional but recommended: a wireless temperature/humidity logger like SensorPush ($50-75).
Specific equipment list with sources:
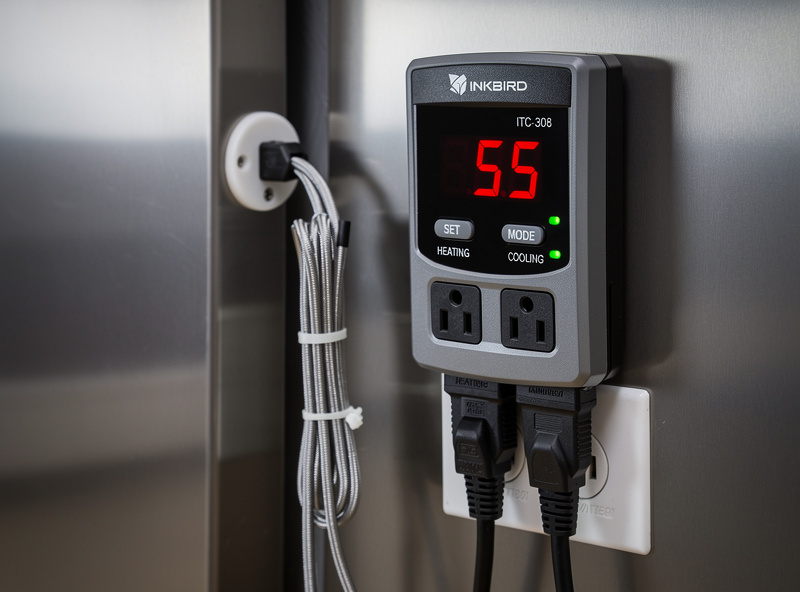
- Inkbird ITC-308 (Amazon, $35-45): Dual-stage temperature controller. Plug fridge into one outlet, humidifier into the other. Reads probe temperature and switches both on/off as needed.
- Ultrasonic humidifier (3-4 liter capacity, $25-40): Small countertop humidifier. Avoid evaporative or warm-mist; ultrasonic produces fine cool mist that disperses well in small spaces.
- USB-powered fan (Amazon, $15-25): Continuous gentle air circulation prevents stagnant pockets of high humidity.
- Stainless steel rods or J-hooks ($20-30): 1/4-inch stainless rod cut to fit, mounted through 1/4-inch holes drilled in side walls. Supports 5-10 pounds per rod.
- Digital hygrometer (ThermoPro TP50, $15-20): Independent verification of humidity. Place separately from the Inkbird probe.
- Silicone sealant (clear food-safe, $8-12): Seal the wire pass-through hole and any door gasket repairs.
- Power strip (essential): 6-outlet strip for Inkbird, humidifier, fan, and any future additions.
Most of these parts arrive within 2 days of ordering. The total budget breakdown for a complete conversion: $50-150 fridge + $130-200 parts = $180-350 total. Compared to commercial curing chambers at $1,500-3,000, the cost savings are real and the chamber performance is equivalent for hobbyist volumes.
Step-by-Step Conversion Procedure
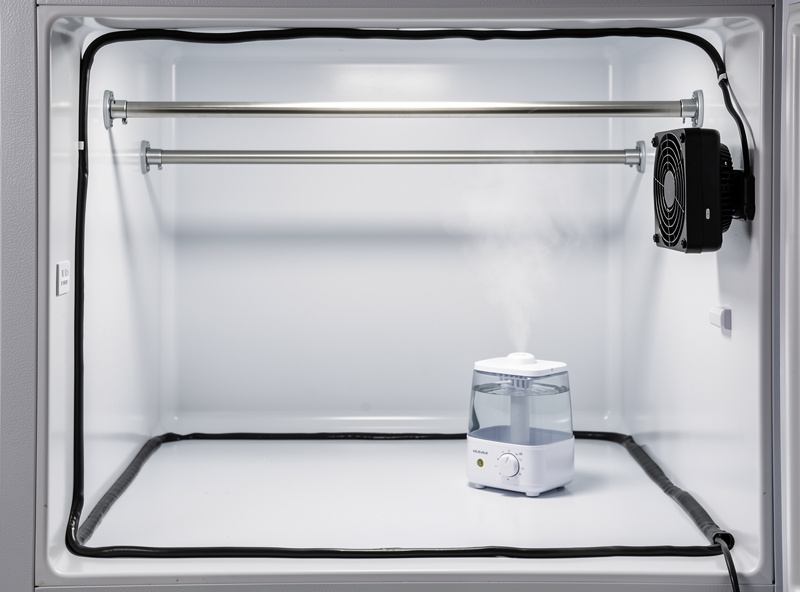
Convert the fridge in this sequence: clean the interior thoroughly, drill a 1/2-inch wire pass-through hole near the bottom for power cords, install the Inkbird probe inside, place the humidifier and fan on the bottom shelf, mount the hanging rods, route power cords through the pass-through hole and seal with silicone, plug the fridge and humidifier into the Inkbird, set target temperature 55°F and humidity target on humidifier, run empty for 24 hours to verify stability.
Full conversion procedure:
- Unplug and clean the fridge thoroughly: Mild bleach solution then rinse. Old fridges harbor bacteria that contaminate charcuterie.
- Drill a 1/2-inch hole near the bottom of the fridge: For power cords. Avoid the cooling coil area. Most fridges have plastic walls that drill easily.
- Install the Inkbird temperature probe: Tape it to the inside top wall, away from the humidifier and direct cooling vents.
- Mount the hanging rods: Drill matching 1/4-inch holes through the side walls; insert stainless steel rod; secure with washers and nuts on the outside.
- Place the humidifier and fan inside: Humidifier on the bottom shelf; fan mounted to side wall via velcro or zip-tie loops.
- Route power cords through the pass-through hole: Humidifier and fan cords go OUT to the Inkbird outside.
- Seal the wire hole with silicone: Inside and outside. Prevents humidity loss.
- Wire to the Inkbird: Fridge plugs into the cooling outlet; humidifier plugs into the heating outlet on the Inkbird.
- Set Inkbird to 55°F: Differential at 1°F. The Inkbird will cycle the fridge to maintain temperature and the humidifier to maintain humidity.
- Run empty for 24 hours: Verify the chamber stabilizes at 55°F and 70-80% RH before adding any charcuterie.
- Test door seal: Place a digital hygrometer near the door gasket; if humidity drops more than 5% near the door versus center, replace gaskets.
The most error-prone step is the wiring at the Inkbird. The “cooling” outlet powers the fridge (which removes heat); the “heating” outlet powers the humidifier (which conceptually adds humidity to fight dryness). Reverse the wires and the fridge stays on continuously while the humidifier never runs. Read about troubleshooting humidity in our companion piece on curing chamber too humid.
The Most Common Conversion Mistakes
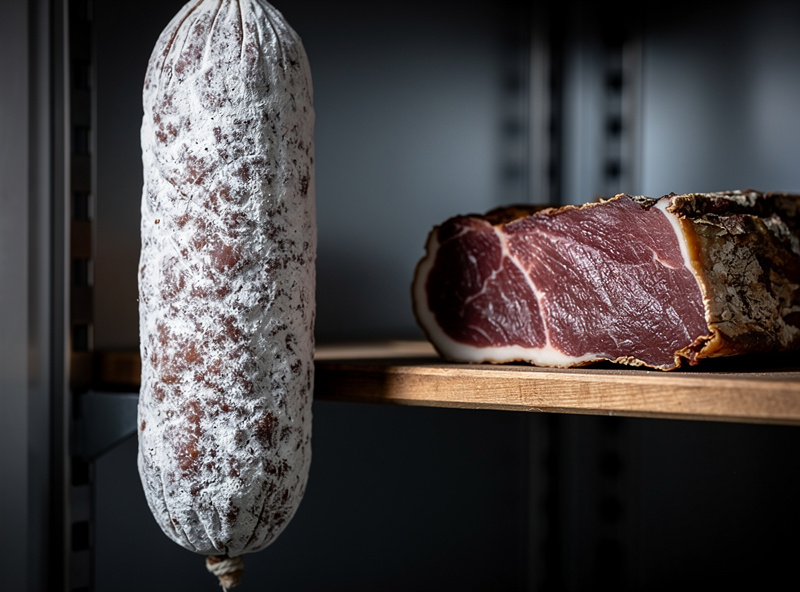
Five mistakes show up in nearly every first-time fridge conversion: picking a static-cooling fridge with a dead or missing internal fan, putting the humidifier too close to the temperature probe, skipping the air circulation fan, not sealing the wire pass-through hole, and adding charcuterie before the chamber stabilizes. Each one ruins charcuterie within 1-3 weeks.
Specific mistakes and fixes:
- Static-cooling fridge with no working fan (UL 250 covers the safety listing for household refrigerators, and any conversion that drills the inner liner needs to preserve the ground bonding the listing depends on; I keep the existing ground wire intact and only add the smart-plug control on the outlet side): A used manual-defrost fridge, or a frost-free unit with a seized internal fan, has no way to move air or shed condensation — humidity builds unevenly and dumps all at once when the ice finally lets go. Disastrous for charcuterie. Solution: pick a working frost-free fridge or a wine cooler.
- Humidifier near temperature probe (I made this mistake on my first build — placed the probe 4 inches from the MistAire’s mist outlet, and the controller saw 95% RH locally while the rest of the chamber sat at 78%): Cool humidifier mist hits the probe and reads false-low. Inkbird cuts the fridge incorrectly. Place probe 6+ inches from humidifier.
- No air circulation fan: Stagnant air creates humidity gradients within the chamber. Without circulation, top of chamber reads 60% RH while bottom reads 85% RH.
- Unsealed wire pass-through: Humidity escapes through the hole continuously. Humidifier runs constantly to compensate; reservoir empties twice as fast.
- Adding meat before stabilization: 24 hours of empty stabilization reveals if the chamber holds 55°F and 70-80% RH reliably. Skipping this step often loses entire batches in week 1.
- Inkbird temperature differential too tight (under 1°F): Causes the fridge to cycle every 5-10 minutes, wearing the compressor. 1-2°F differential is correct.
- Chamber overpacked: Fill the chamber 50-60% maximum. Air circulation needs space; full chambers develop mold problems quickly.
The reliable practice is to run the chamber empty for at least 48 hours before any charcuterie goes in, log the temperature and humidity every 6 hours during that period, and only proceed with charcuterie when both metrics stay within ±2°F and ±5% RH of targets. The patience pays back in not losing $50-100 of meat to chamber instability.
Maintaining the Converted Chamber
Maintenance involves: refilling the humidifier reservoir every 2-3 days, cleaning the humidifier monthly with white vinegar to prevent mineral buildup, wiping down chamber walls weekly with a clean cloth (no soap), replacing the door gasket every 3-5 years if humidity becomes hard to maintain, and re-calibrating the hygrometer every 3 months with the salt-slurry test.
Maintenance schedule:
- Daily: Visual check of meats; note any color changes or unexpected mold growth.
- Every 2-3 days: Refill humidifier reservoir.
- Weekly: Wipe chamber walls and shelves with damp cloth (no soap residue).
- Monthly: Clean humidifier reservoir with white vinegar to remove mineral scale.
- Quarterly: Salt-slurry test the hygrometer; recalibrate Inkbird probe if reading drifts.
- Annually: Replace humidifier filter (if equipped); inspect door gasket for compression.
- Every 3-5 years: Replace door gaskets; deep-clean condenser coils; consider replacing humidifier if it loses output.
A well-maintained converted fridge runs reliably for 5-10 years before needing major component replacement. Total cost of ownership over 10 years (replacements, refills, electricity) runs roughly $500-800 — still vastly less than a single commercial chamber. Read about advanced humidity troubleshooting in our piece on curing chamber too humid.
Total Build Cost Breakdown 2026
Here is what a realistic curing chamber build costs in 2026, based on the two chambers I run and the parts I have replaced over 18 months. The budget path uses a used mini-fridge; the mid-tier uses a full-height larder fridge that holds more meat.
| Component | Budget (mini-fridge) | Mid-tier (full fridge) |
|---|---|---|
| Fridge (used, Marketplace) | $50-75 | $100-150 |
| Temperature controller (Inkbird ITC-308) | $35-45 | $35-45 |
| Humidity controller (Inkbird IHC-200) | Optional | $40-50 |
| Ultrasonic humidifier | $25-40 | $30-50 |
| Circulation fan (USB or 120mm) | $15-25 | $20-30 |
| Hanging rods / hooks | $20-30 | $25-35 |
| Digital hygrometer | $15-20 | $20-25 |
| Silicone sealant + grommets | $8-12 | $8-12 |
| Total | $168-247 | $278-397 |
The budget build gets you curing on day one. The mid-tier adds the IHC-200 humidity controller, which I consider essential once you move past your first batch — the ITC-308 alone cannot hold a tight humidity window, and humidity is the variable that decides whether your charcuterie dries evenly or case-hardens. The SensorPush logger ($50-75) is the first upgrade I would buy after the build is running — it catches drift before it ruins a batch.
The curing chamber lighting guide covers LED selection and safe wiring inside the chamber.
Frequently Asked Questions
How much does it cost to convert a fridge into a curing chamber?
Total cost is 180-350 dollars: 50-150 dollars for a used fridge, 130-200 dollars for the Inkbird controller, humidifier, fan, hanging rods, hygrometer, and sealant. Compared to a commercial curing chamber at 1500-3000 dollars, the savings are dramatic and the performance for hobbyist volumes is equivalent.
Can I use a regular fridge or do I need a wine cooler?
Regular fridges work fine, and I’d actually lean frost-free (auto-defrost) over an old manual-defrost unit — the defrost cycle keeps the coil from icing over, so the fridge runs the interior air drier and more predictably, which is one less variable to fight. Wine coolers are convenient because they natively run at 50-60°F, requiring less Inkbird intervention, but a working frost-free fridge produces equivalent results once it is dialed in.
Should I avoid a fridge with auto-defrost?
No — auto-defrost (frost-free) is actually the better starting point. The defrost cycle keeps the evaporator coil from icing over, so the fridge runs drier and more consistently, which is why most working DIY chambers I have seen (mine included) started life as a frost-free fridge. What you do want to avoid is a fridge with a dead internal fan or a static-cooling (manual-defrost) unit with no active dehumidify behavior — those let condensation build up on the cold plate and dump humidity into the chamber all at once when it finally melts.
Do I need both a humidifier and a dehumidifier?
Most home conversions only need a humidifier. Fridges naturally pull moisture from interior air during cooling cycles, dropping humidity below ideal. The humidifier compensates. Excess humidity is rare unless the chamber is overpacked or sealed too tightly. Open the door for 5-10 minutes if RH spikes above 85%.
How long does the conversion take?
Active build time is 2-4 hours plus 24 hours of empty stabilization. Full setup including Inkbird programming, wire routing, and seal verification fits in a single weekend. Adding charcuterie should wait until the 24-hour stabilization confirms reliable temperature and humidity targets.
What is the best Inkbird model for a curing chamber?
I run the ITC-308 for temperature — dual-stage (heating + cooling outputs), 1100W per outlet, 0.1°F precision, around 35-45 dollars — paired with a separate Inkbird IHC-200 humidity controller (dual-stage humidify and dehumidify, around 40-50 dollars) once I moved past my first batch. That two-controller combo is what I actually run in my primary chamber: dedicated controllers hold each variable tighter than a single combo unit trying to do both jobs off one probe. For a first budget build, the ITC-308 alone plus a humidifier with a built-in humidistat works fine.
Related Articles
- Curing Chamber Too Humid: How to Fix Oversaturation
- Dry Aging Smell: Normal vs Trouble
- Black Mold on Charcuterie
- Duck Prosciutto Beginner Project
- Salami Casing Mold: Good vs Bad