Curing Chamber Lighting Setup: Does Light Affect Meat Curing? What to Install
May 12, 2026

Light accelerates fat oxidation in curing meat — the same UV and visible-spectrum wavelengths that make a steak display case look appealing are actively degrading the fat in your salami and bresaola every hour the light stays on. A curing chamber should be dark 23.5 hours a day, with a low-wattage cool-white LED switched on only for the thirty-second inspection glance you need to read a weight scale or check mold coverage.
As an Amazon Associate I earn from qualifying purchases.
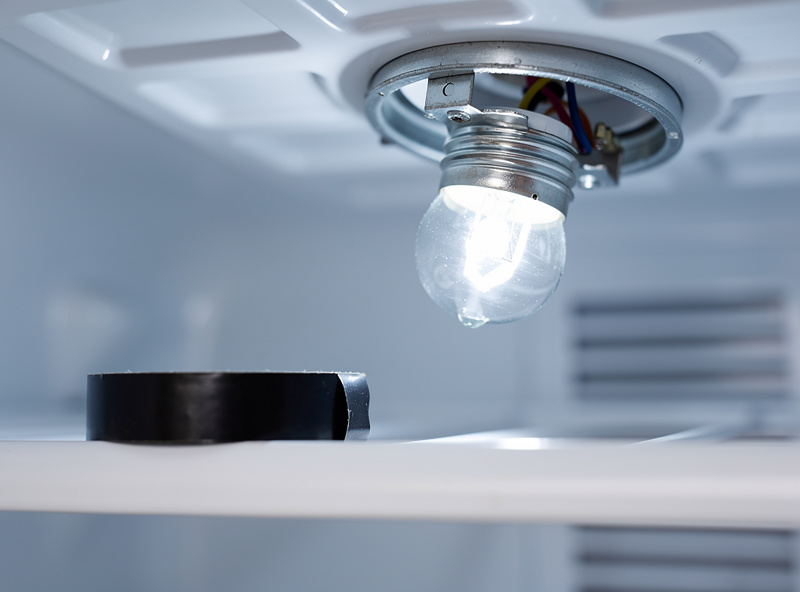
The standard fridge light that comes with the unit is the first thing I disable on every chamber build. A 15-watt incandescent bulb in a sealed 4.5-cubic-foot box adds 4-6°F of heat directly above the meat hanging closest to the light, creates a hot spot the controller cannot see because the probe is elsewhere, and runs whenever the door is open — which is when the chamber is least stable. This guide covers why light matters at all for cured meat, what spectrum and wattage is safe, and how to wire a chamber light that does not sabotage the cure.
Why Light Matters in a Curing Chamber
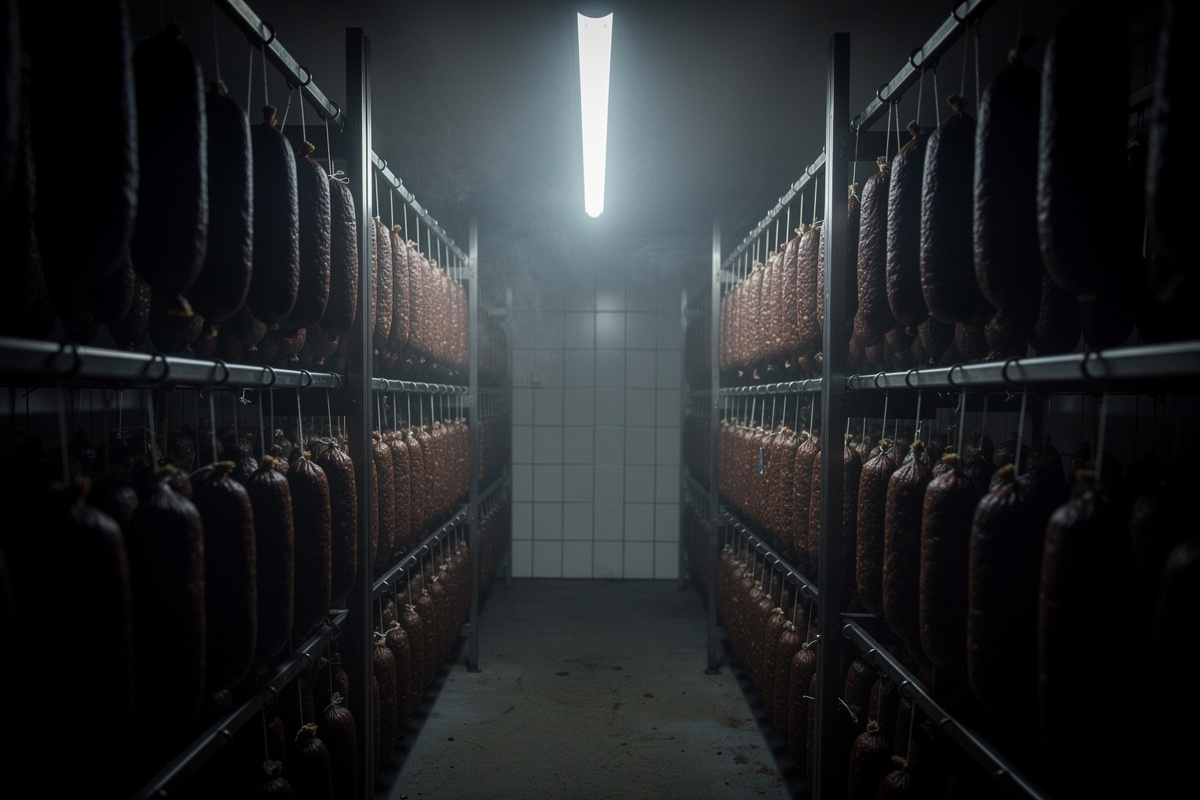
Fat oxidation is the primary concern. When light hits unsaturated fats — the kind that make coppa and pancetta taste rich and complex — it triggers a free-radical chain reaction that turns those fats rancid. The reaction is called photo-oxidation, and it runs noticeably faster than the normal oxidation that happens in darkness — a 2024 peer-reviewed study on dry-cured fish found that high-intensity light and UV exposure measurably accelerated both fat oxidation and myoglobin oxidation together, the same two-front degradation this chamber is built to avoid. Meat hanging near a light source develops a stale, cardboard-like flavor that starts subtle and becomes unmistakable by week four of a six-week cure.
UV light specifically degrades the myoglobin pigment in red meat, turning the deep ruby color of properly cured bresaola into a flat brown-gray. This is cosmetic — the meat is still safe — but the visual difference between a light-exposed bresaola and a dark-cured one is the difference between serving something that looks artisan and something that looks like it sat in a deli case too long.
Mold is the third variable. The beneficial white mold on salami casings — Penicillium nalgiovense — grows fine in the dark but gets patchy and uneven when exposed to direct light. The side of a salami facing the chamber light develops less mold coverage than the shaded side, creating an asymmetric rind that looks amateur. Commercial curing rooms are windowless for this exact reason — even indirect daylight through a basement window is enough to bias mold growth on the light-facing side of the hanging rack.
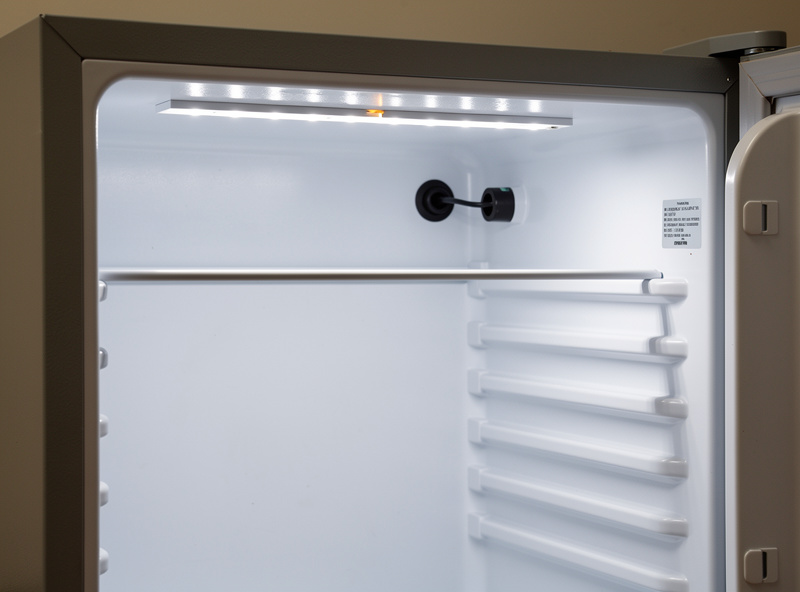
What Lights Are Safe: LED Only, Cool White, Under 3 Watts
The only lighting I trust inside a curing chamber is a cool-white LED strip or puck light that draws under 3 watts and produces no measurable heat at the distance meat hangs from it. I run an LE-style 12 V LED puck light kit wired to a 5 W USB adapter outside the chamber — a 3-puck kit runs about $18-20, 5000 K daylight white, and the LEDs measure cold to the touch after an hour of run time. LED is the right choice for three reasons: zero UV output in the spectrum that triggers fat oxidation, minimal heat generation compared to any other lighting technology, and low-voltage DC power that is safe to run inside a 75% humidity environment when the connections are sealed.
Incandescent bulbs — including the factory fridge bulb — are the wrong choice for every reason that matters. They produce heat in direct proportion to light output, emit across the full spectrum including UV-A, and the heat cycles stress the bulb filament until it fails, usually when the door is closed and you cannot see the pop. Halogen bulbs are worse — they run hotter and their quartz envelope transmits UV more efficiently than standard glass.
Fluorescent tubes are not an option inside a mini fridge chamber for practical size reasons, but even compact fluorescents produce UV-C as a byproduct of the mercury vapor discharge, and the phosphor coating that blocks most of it degrades over time. If you have a full-size chamber with fluorescent shop lights, replace them with LED equivalents.
The color temperature should be cool white — 4000K to 5000K. Warm white LEDs (2700K-3000K) cast a yellow-orange hue that makes it harder to judge the color of meat and mold. A pale-green mold spot on a salami casing looks brown under warm light, and you will miss problems that cool light would reveal instantly. The troubleshooting guide covers the visual inspection routine, but the inspection only works if the light lets you see what you are looking at.
Wiring a Chamber Light: Switch, Sealing, and Placement
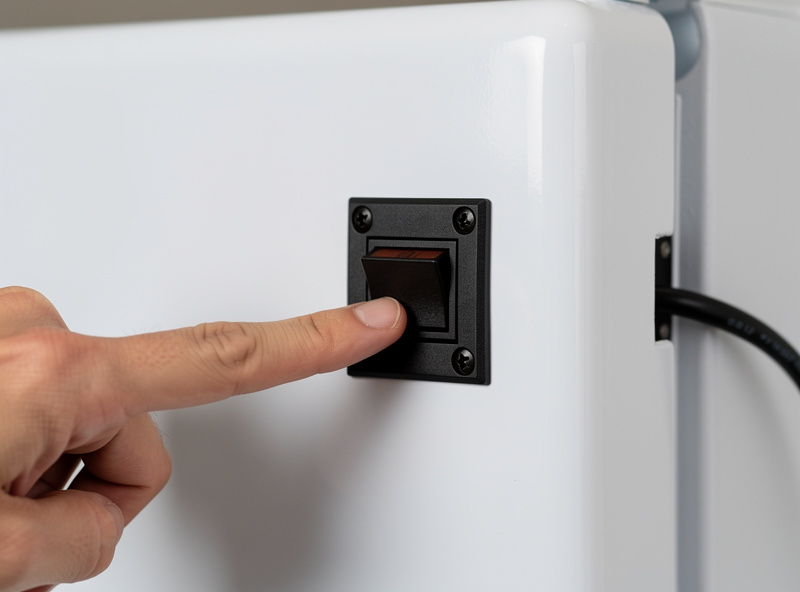
The chamber light needs three things: a switch on the outside of the fridge, sealed wiring at every penetration, and placement that lights the hanging meat without casting shadows that hide the back corners. The circuit is simple — a 12-volt DC LED strip powered by a 5 V Anker PowerPort wall adapter outside the chamber, with the positive wire interrupted by a Carling SPST momentary rocker switch (about $4 at any electronics supply) mounted to the outside of the fridge door or cabinet. The Carling switch returns to off when you release it, which is the behavior you want — a toggle switch left on after closing the door is exactly how my first chamber ran with the light on for two days before I caught it.
The switch goes on the outside for a reason: opening the door to look at meat is the moment when humidity crashes. A switch on the outside lets you flick the light on, look through the door — assuming you have a glass door or are using a fridge with a viewing window — and turn it off without opening. If your chamber has a solid door, the light goes on a momentary switch that you press while the door is open for the minimum inspection time, and the light turns off when you release it. No toggle switch that stays on after you close the door.
The wiring follows the same drilling and sealing rules as probe wires: penetrate through the door or the front half of a side panel, seal with a grommet and food-grade silicone, and leave a service loop. The LED strip mounts to the ceiling of the chamber with adhesive backing, positioned so the light shines down between the rows of hanging meat rather than directly onto the meat surfaces. A strip that casts light horizontally across the meat creates dramatic shadows that hide the back third of the chamber — aim the light straight down from the ceiling, centered between the hanging rows. The food-zone requirements NSF/ANSI 2 sets for commercial food equipment apply by analogy here — non-toxic, corrosion-resistant materials, easy to clean, and no exposed live conductors in a humid environment.
| Light Type | Wattage | UV Output | Heat Added | Safe for Chamber? |
|---|---|---|---|---|
| Cool White LED (4000K-5000K) | 1-3W | None | Negligible | Yes — best choice |
| Warm White LED (2700K-3000K) | 1-3W | None | Negligible | Safe but poor color rendering |
| Factory Incandescent Fridge Bulb | 15-40W | Low (UV-A) | 4-6°F | No — disable it |
| Halogen Bulb | 20-50W | Moderate (UV-A + UV-B) | 8-12°F | No — high heat and UV |
| Compact Fluorescent (CFL) | 9-13W | UV-C present | 2-4°F | No — UV risk and phosphor degradation |
How to Disable the Factory Fridge Light
The factory fridge light has a door plunger switch that turns the light off when the door closes — but the switch is a mechanical part in a humid, salty environment, and it will eventually fail closed, leaving the light on 24/7 inside a closed chamber you cannot see into. The light adds 15-40 watts of continuous heat, cooks the meat closest to it, and you discover it only when you open the door days or weeks later and find a hot spot and an oxidized bresaola. That is exactly how I lost my second-ever bresaola in week four — the plunger switch had stuck closed in the humidity, the 25 W bulb ran for three days against the top of the chamber, and the top inch of the muscle had gone gray and rancid before I opened the door for a weekly check. The whole point of cool-white LED with an outside switch is to remove that failure mode from the chamber entirely.
The fix is removing the bulb entirely and taping over the socket with 3M Super 33+ vinyl electrical tape (a premium all-weather grade rated for cold-weather flexibility that holds up well in humidity), then wrapping the tape with a zip tie or a strip of adhesive-backed foam so the wrap stays put for years. Generic bargain-bin electrical tape dries out and flakes within a couple of months in a humid chamber — stick with a name-brand all-weather tape like 3M’s Super 33+ or the heavier Super 88, both of which are built for exactly this kind of exposure. Do not just unscrew the bulb and leave the socket exposed — the socket carries 120V AC, and the humidity inside a curing chamber is enough to arc across the socket contacts if condensation bridges them. The result is a short that trips the breaker or, worse, a slow arc that melts the socket plastic and fills the chamber with acrid smoke while your salami are hanging.
For fridges where the light socket is integral to the thermostat circuit — some compact models route power through the light socket to the thermostat — remove the bulb, disconnect the wire harness from the socket at the control board, and cap the wire ends with heat-shrink butt connectors. If you are not sure whether the socket is in the thermostat circuit, removing the bulb and taping the socket is the safe play. The fridge conversion guide covers the full electrical teardown for the light and thermostat circuits.
Inspection Lighting Practices That Protect the Cure
The light should be on for thirty seconds or less per inspection. Open the door, flick the light, read the weight log and check the mold coverage, flick the light off, close the door. The chamber climate recovers in ten to fifteen minutes from a brief door opening with the light off; with the light on for an extended inspection, the recovery time stretches because the LED heat — small as it is — and the open-door humidity loss compound.
Weight readings are the primary inspection task, and the climate control data logger handles temperature and humidity without opening the door at all. If your sensors log to a phone app or a display outside the chamber, the door only opens for visual mold checks and weight recordings — once every three to four days for whole-muscle cuts, once a week for salami after the first two weeks. Less door time equals less light exposure equals less oxidation.
Frequently Asked Questions
Does light really affect cured meat in a chamber?
Light triggers photo-oxidation in unsaturated fats, making cured meat go rancid roughly twice as fast as meat cured in darkness. UV light degrades myoglobin pigment, turning red bresaola brown. Direct light also causes uneven mold growth — the light-facing side of salami develops less Penicillium coverage than the shaded side.
What type of light should I install in a curing chamber?
A cool-white LED strip or puck light drawing under 3 watts, with color temperature between 4000K and 5000K. LED produces zero UV output and negligible heat. Warm white LEDs are safe but make it harder to judge meat and mold color during inspections.
Should I disable the factory fridge light?
Yes. The factory incandescent bulb adds 4-6°F of heat, emits UV, and the door plunger switch can fail closed in the humid environment, leaving the light on 24/7. Remove the bulb and tape over the socket. If the socket is in the thermostat circuit, disconnect the harness at the control board.
How long can the chamber light stay on during inspection?
Thirty seconds or less per inspection. Longer exposure adds cumulative light hours that accelerate fat oxidation over the course of a six-week cure. Use a momentary switch that turns off when released so the light cannot be left on accidentally after closing the door.
Can I use a glass-door fridge so I can see inside without opening it?
A glass door lets you inspect the chamber without opening it, which preserves humidity and reduces light exposure when paired with an externally switched LED. However, the glass door exposes meat to ambient room light 24/7 unless the room is dark or the glass is covered. Cover the glass with a curtain or blackout film when not inspecting.
Does LED strip lighting need sealed connections in a curing chamber?
All electrical connections inside a 75% humidity chamber must be sealed. Use heat-shrink butt connectors covered with a second layer of marine-grade heat shrink that includes adhesive lining. Standard electrical tape peels in high humidity within weeks and exposes live connections to condensation.
Related Articles
- How to Build a Curing Chamber: The Complete Guide
- How to Drill a Curing Chamber Without Breaking Refrigerant Lines
- Curing Chamber Climate Control: Temperature, Humidity, and Airflow Science
- Curing Chamber Troubleshooting: The Complete Guide
- How to Convert a Fridge Into a Curing Chamber: Step-by-Step Guide